SSO with Okta
Configure Okta as a SAML identity provider.
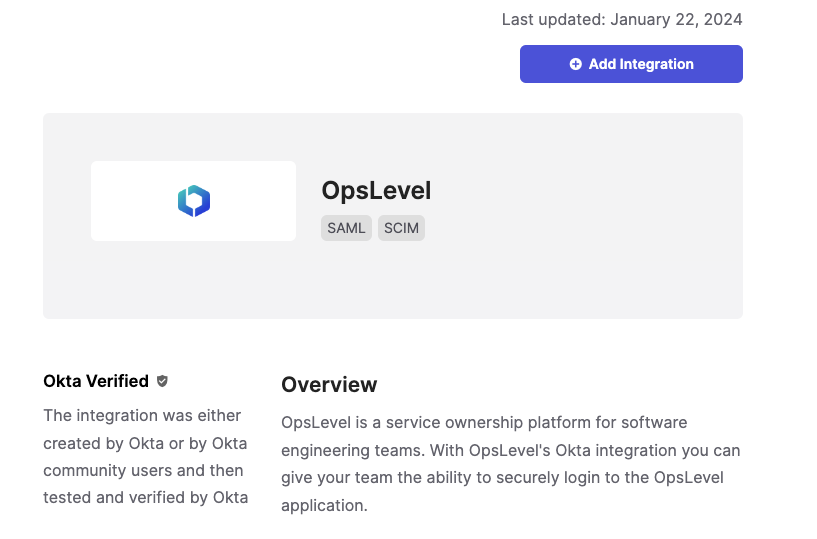
The OpsLevel Single Sign-On authentication method can be used with your organization’s existing Okta identity provider by configuring a SAML integration. Below are the detailed steps on how to get started using Okta and SAML.
Contents
Supported Features
Configuration Steps
Notes
SP-initiated SSO
Supported Features
The Okta/OpsLevel SAML integration currently supports the following features:
- SP-initiated SSO
- IdP-initiated SSO
- JIT (Just In Time) Provisioning
For more information on the listed features, visit the Okta Glossary.
Configuration Steps
Note: You will need access to your SAML Endpoint URL located in the Authentication Method section of your Account Settings. Only admin users will have access to this section

To set up an Okta SAML application, first:
1. From the Okta dashboard, navigate to the Applications tab.
2. Click Browse App Catalog button in the top left.
3. Search for OpsLevel and click the integration tile to bring up integration page.

4. Click Add Integration to add this integration to your Okta account.
5. Specify an Application Label for the integration. We recommend OpsLevel as this is what your employees will see.
6. Click Done to begin configuring the SAML settings for you integration.
7. (Optional) You will be left on the Assignments tab - here you can assign your users or groups that will be allowed to access OpsLevel.
9. Sign in to your OpsLevel instance as an administrator.
10. Go to Account and scroll down to Authentication Method and click Edit.
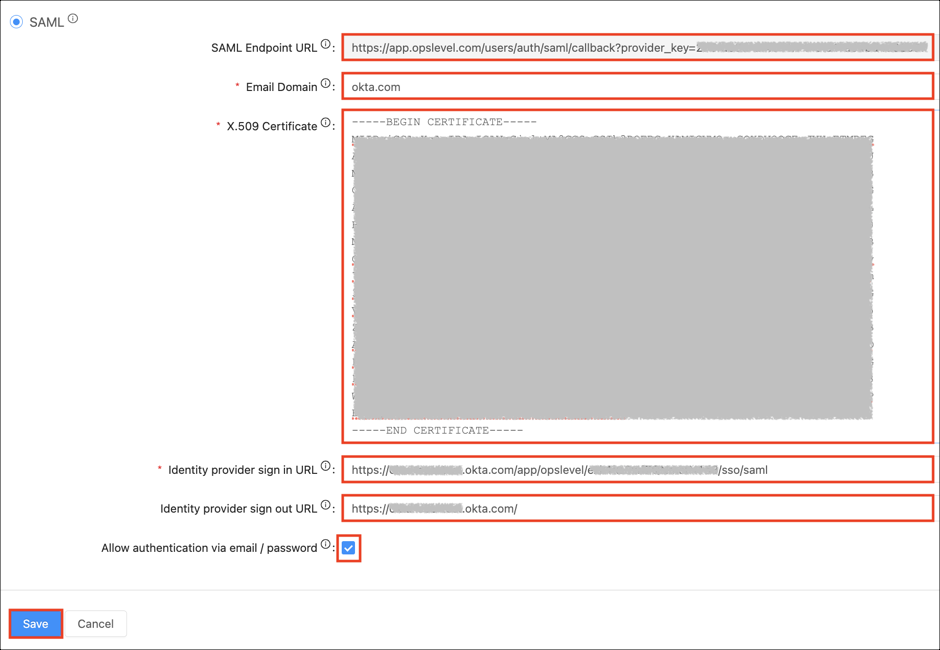
11. Enter the following:
- Enable SAML.
- SAML Endpoint URL: Make a note of your Provider Key value from the SAML Endpoint URL. For example: If your SAML Endpoint URL is https://app.opslevel.com/users/auth/saml/callback?provider_key=123456789. Your Provider Key is 123456789
- Email Domain: Enter your Email Domain.
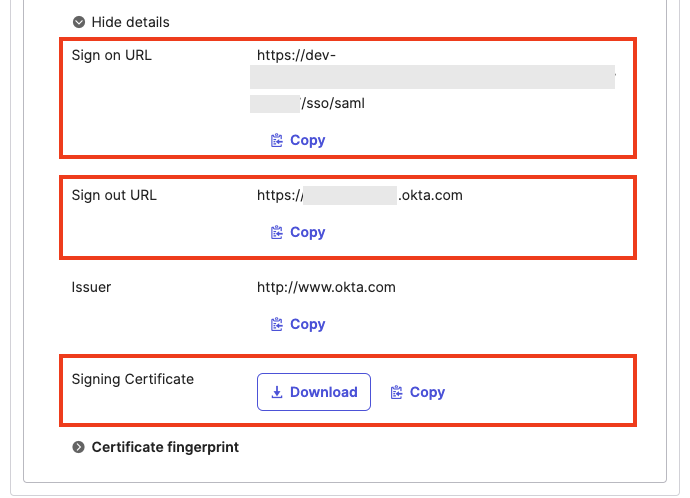
12. Go back to the OpsLevel App in Okta, click the Sign On tab. Go to the SAML 2.0 section, and click More Details. Then copy over these items into the OpsLevel SAML Configuration:
- X.509 Signing Certificate
- Identity provider sign in URL
- [OPTIONAL]Identity provider sign out URL
13/. Allow authentication via email/password: Check this option.
- Note: This allows signing in using email and password. Don't uncheck this before SAML is tested and works.
- Click Save.
14. In Okta, select the Sign Ontab for the OpsLevel SAML app and scroll down to Advanced Sign-on Settings.
- Enter your Provider Key (step 3) into the corresponding field.
- Click Save.
15. Done!
Notes
The following SAML attributes are supported:
| Name | Value |
|---|---|
| first_name | user.firstName |
| last_name | user.lastName |
| user.email |
SP-initiated SSO
- Go to: https://app.opslevel.com/users/sign_in
- Click Log in with SSO.
Troubleshooting
If you are having trouble setting up your single sign-on in any way, send us an email at [email protected] and we’ll be happy to help debug and diagnose any issues.
Updated 7 months ago