Creating your first Action
Actions enable users to complete common, standardized tasks in an easy and consistent way
Admins can create a new Action by navigating to the Settings > Manage Actions page and clicking on the New Action button.
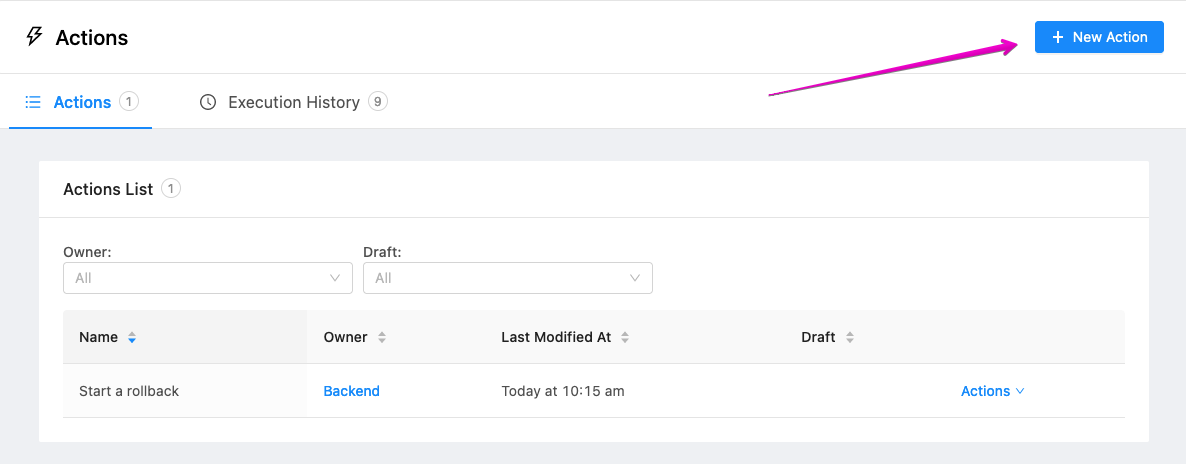
Once pressed, you can choose to get started using one of our Action Templates or build your own from scratch.
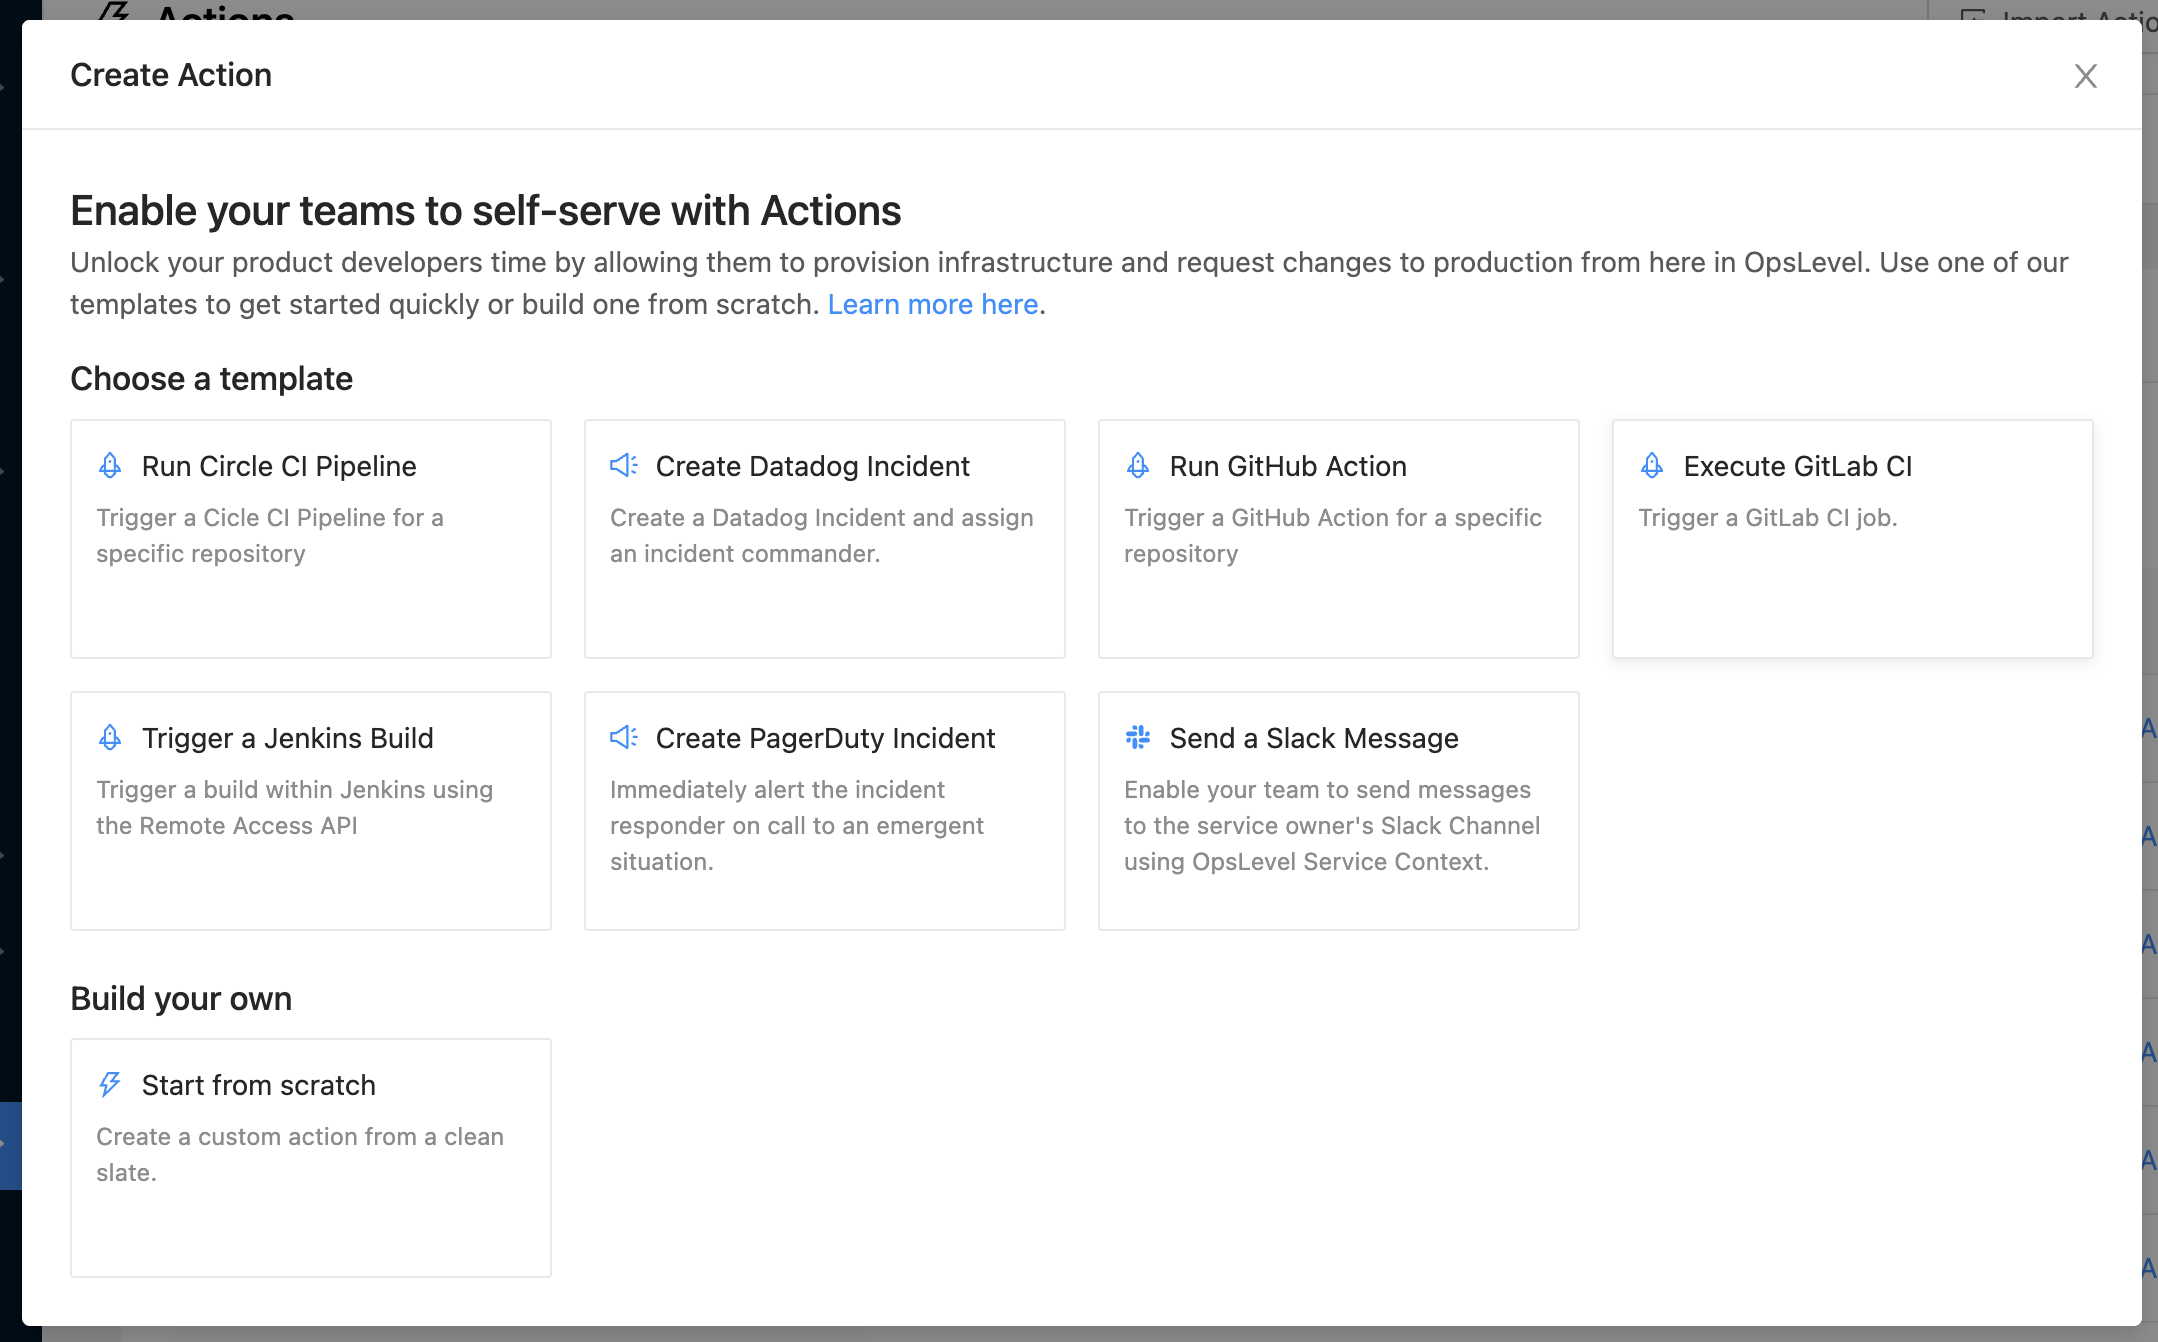
This guide will outline how to start from scratch and provide you with more context about how each element of the Action configuration is used. To learn more about how to use the templates, check out their guide here.
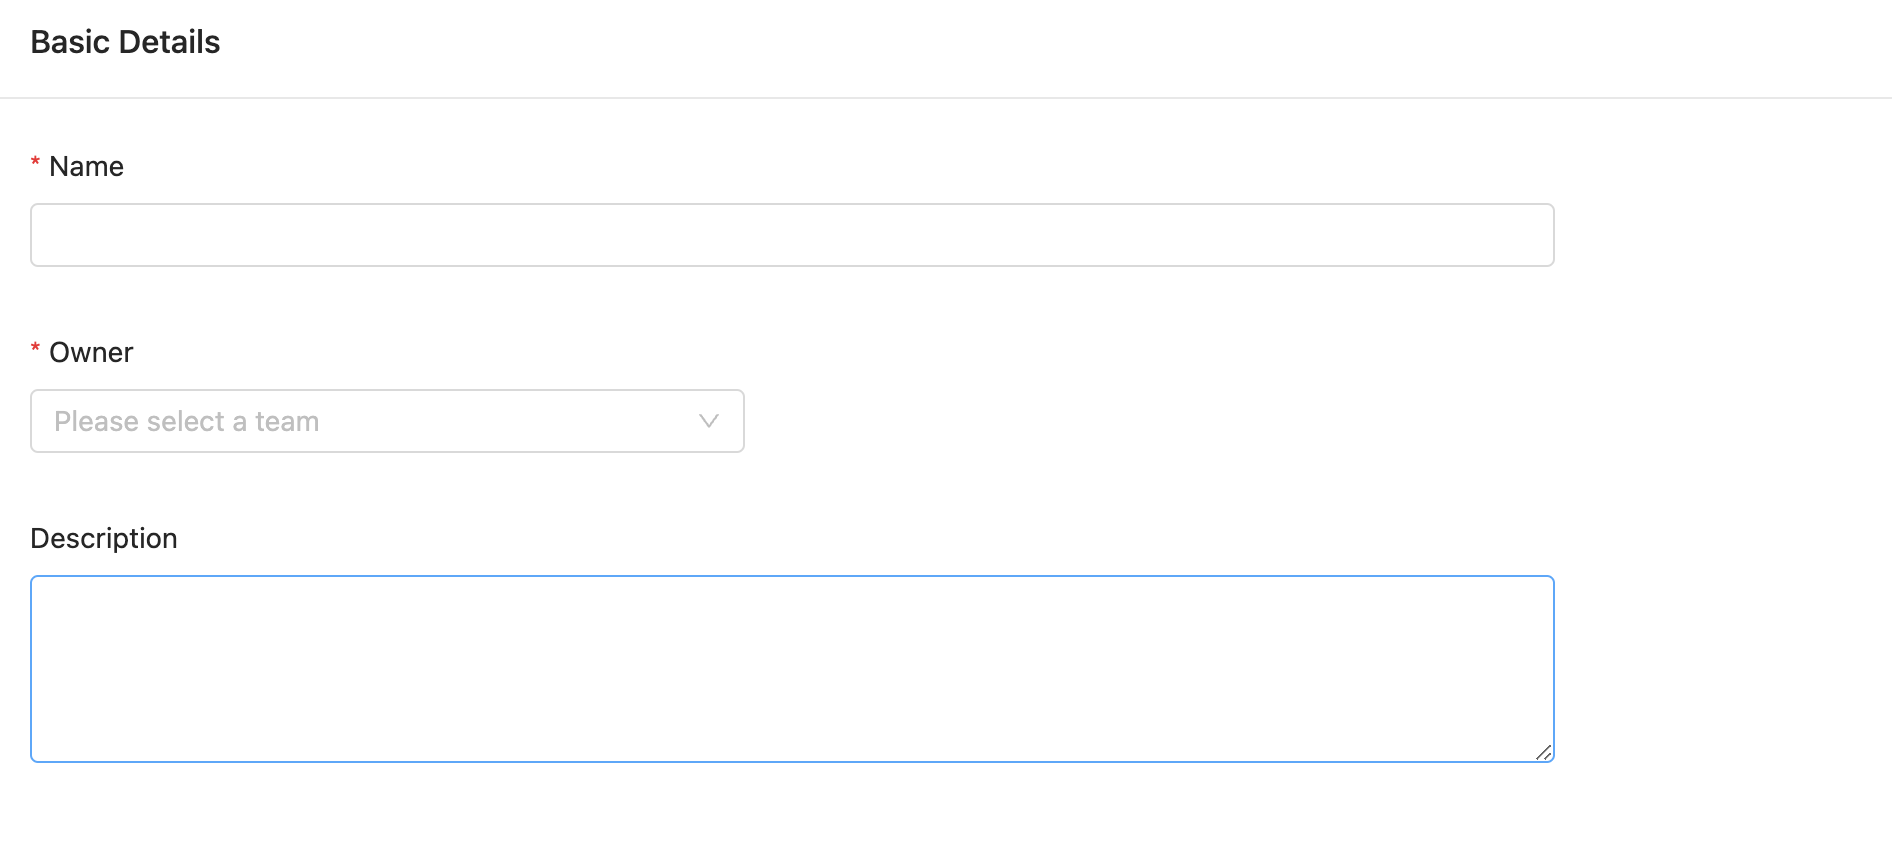
Basic Details
An Action's basic details provides context to users about who manages the action and how it should be used.
| Description | |
|---|---|
| Name | The name of the action. Users will see this when invoking the action |
| Owner | The team is responsible for maintaining this action. Users invoking an action will be directed to this team in case of error. |
| Description | Additional information about what this action does or how it works. Users will see this information before invoking the action. |
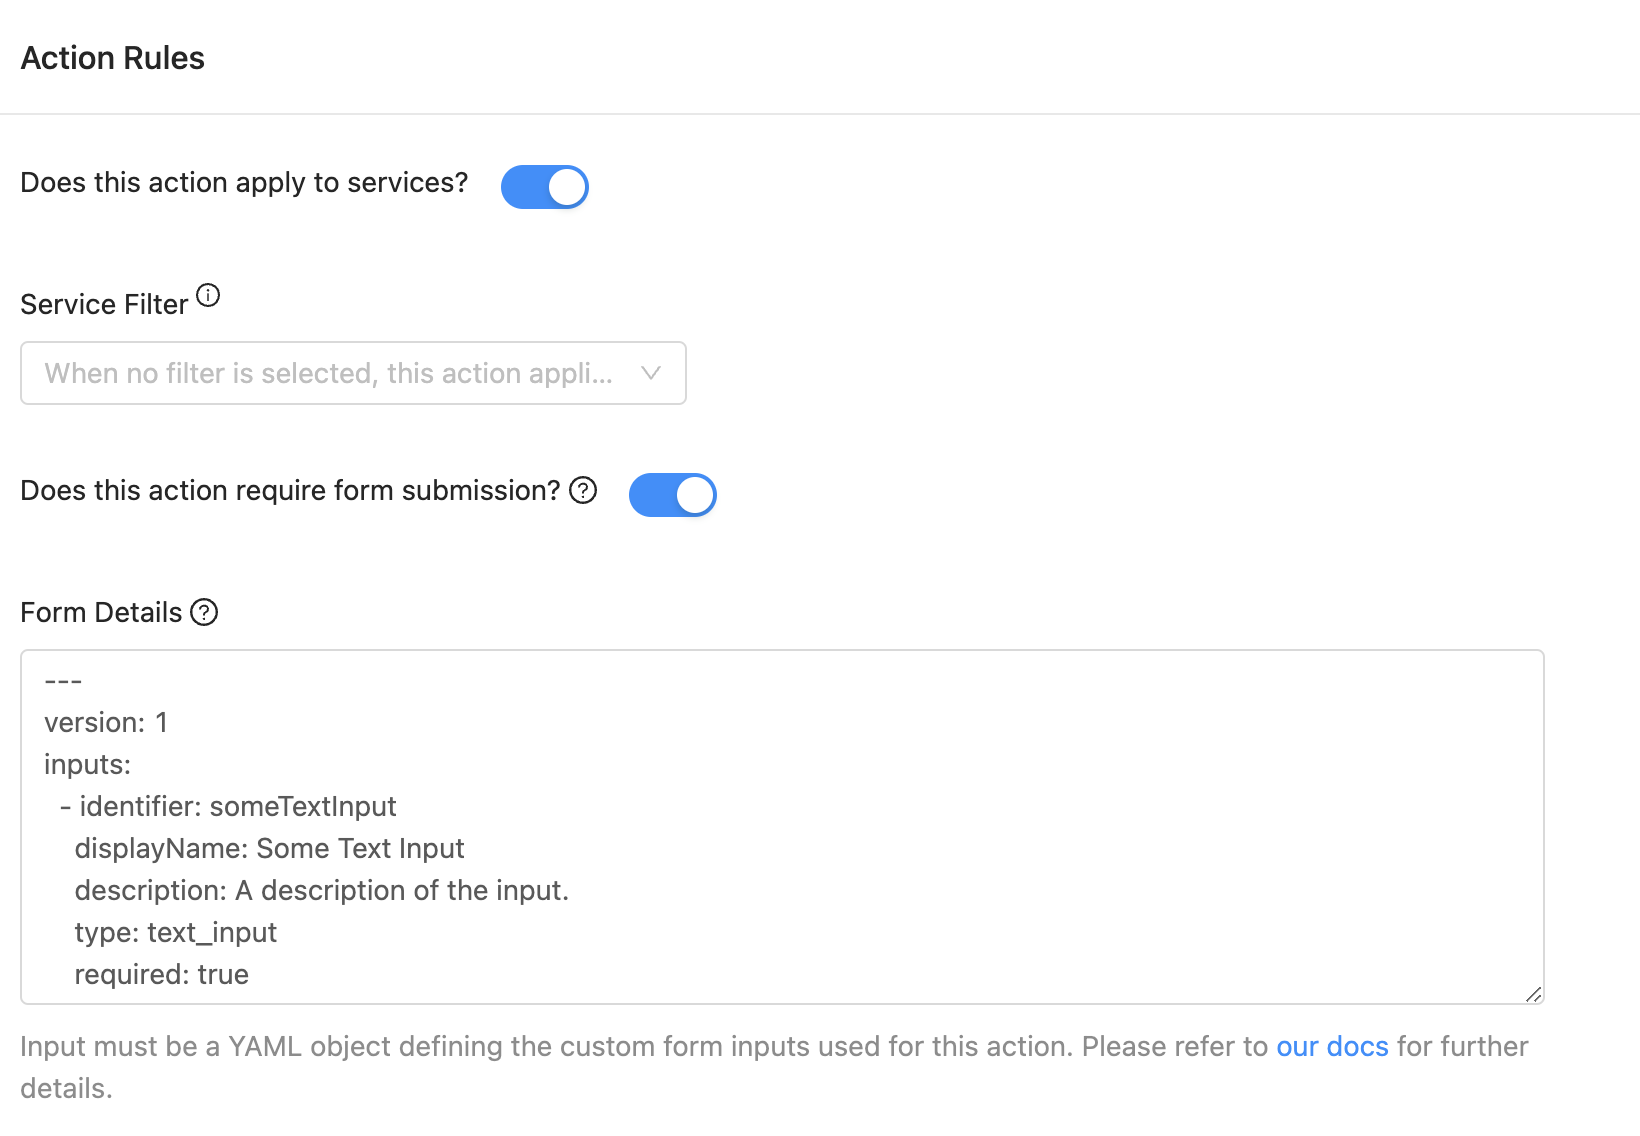
Action Rules
This section allows the administrator to define the context required by an action and the webhook that will be sent when the action is executed successfully.
Configuring the context available to the action
If you configure an action to apply to services, the action's webhook will automatically have access to service details. When an action applies to services, they can be scoped to only be available to a subset of the services in your OpsLevel account. For example, an action to provision infrastructure could be set to only apply to services with a tag of prod_enabled: true.
You can also prompt users who are triggering the action for additional context by adding a form to the action.
The Action Rules section is where all of this configuration is managed.
| Description | |
|---|---|
| Does this action apply to services? | If yes, the action will automatically have access to service context and be available on the Service page. |
| Service Filter | Only visible if Does this action apply to services? is true. When set, this action will only be available to services that match the filter. Actions will be available to all services by default. To learn more about filters, go here . |
| Does this action require form submission? | Enables the Form Details field allowing you define the action’s user input fields. Default: false |
| Form Details | Define the input fields that will be presented to the user. These allow users to provide contextual information to the action being triggered. Inputs are defined using YAML markup, see Configuring Manual Inputs for more information. |
Configuring the webhook
An Action's rules also define the HTTP Request that is sent when the action is triggered. You are able to define the URL where the request will be sent and any information included in the payload or headers.
See the end-to-end example for a sample of Action Rules, including parameterizing a URL with Liquid.
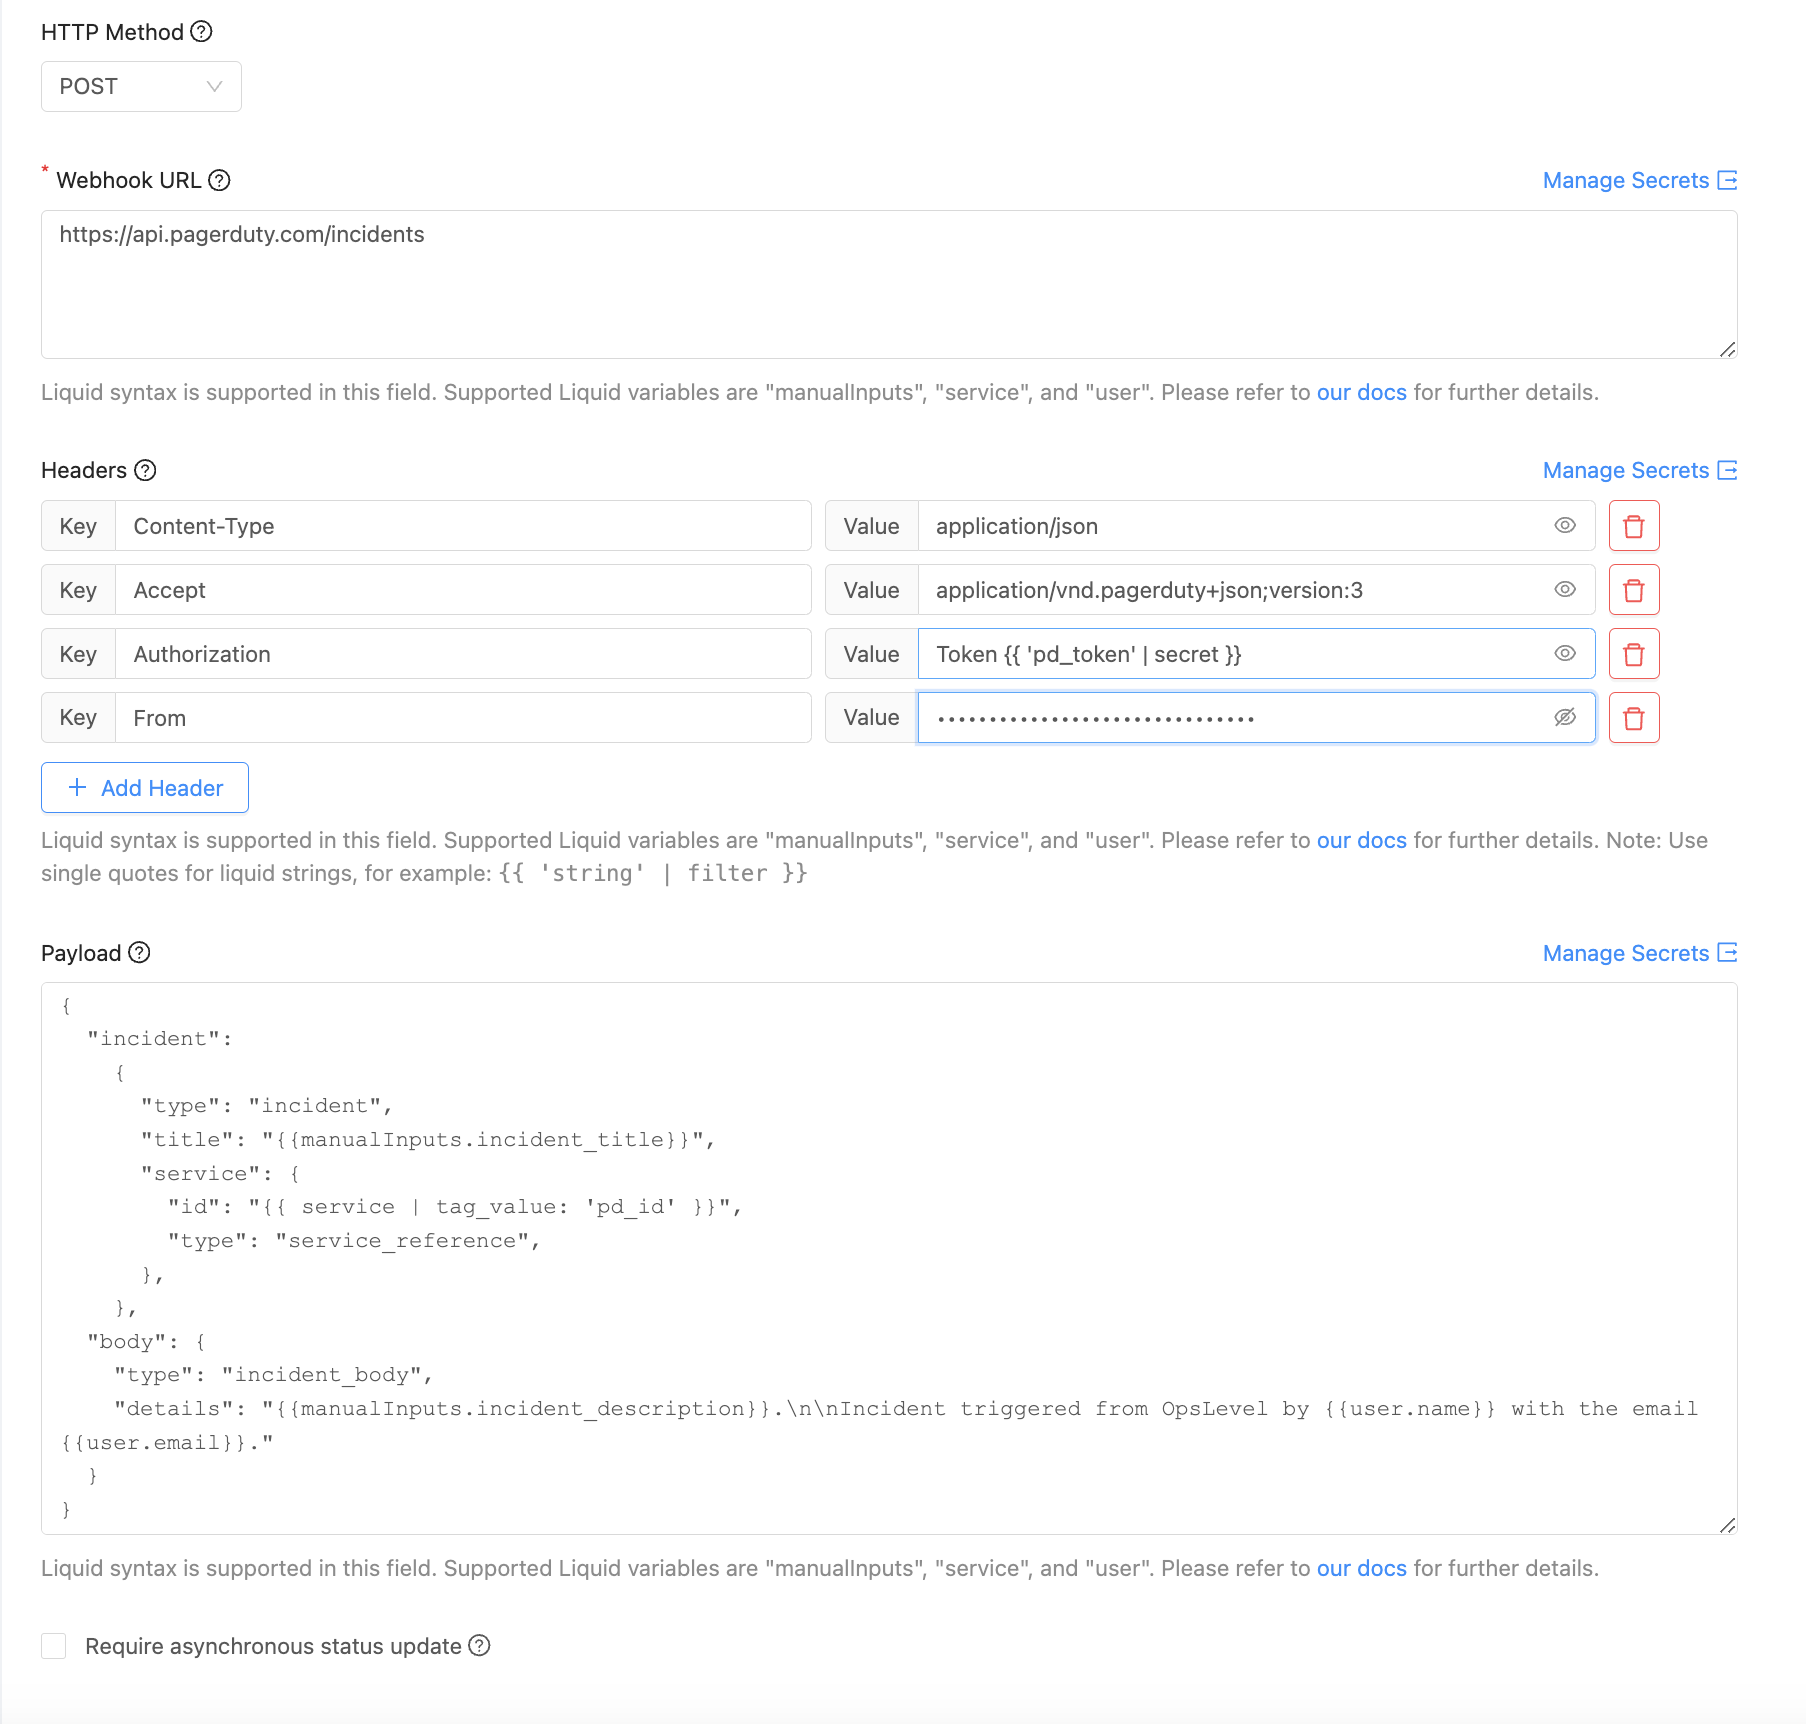
| Description | |
|---|---|
| HTTP method | The HTTP method that will be used when the action is invoked. Supported values: GET, POST (Default), PATCH, PUT and DELETE. |
| Webhook URL* | The destination of the HTTP request. |
| Headers* | A list of key-value pairs. Note: JSON representation should be used when working with actions via the API. |
| Payload* | The body of the HTTP request. |
| * | These fields can dynamically insert information from the action’s context via liquid templating. See the Action Context Schema for the list of fields available and this example for how to use them. |
If the request is authenticated or requires other secure information, we recommend storing them as secrets and referring to them using liquid syntax. For example, {{ 'api_token' | secret }}.
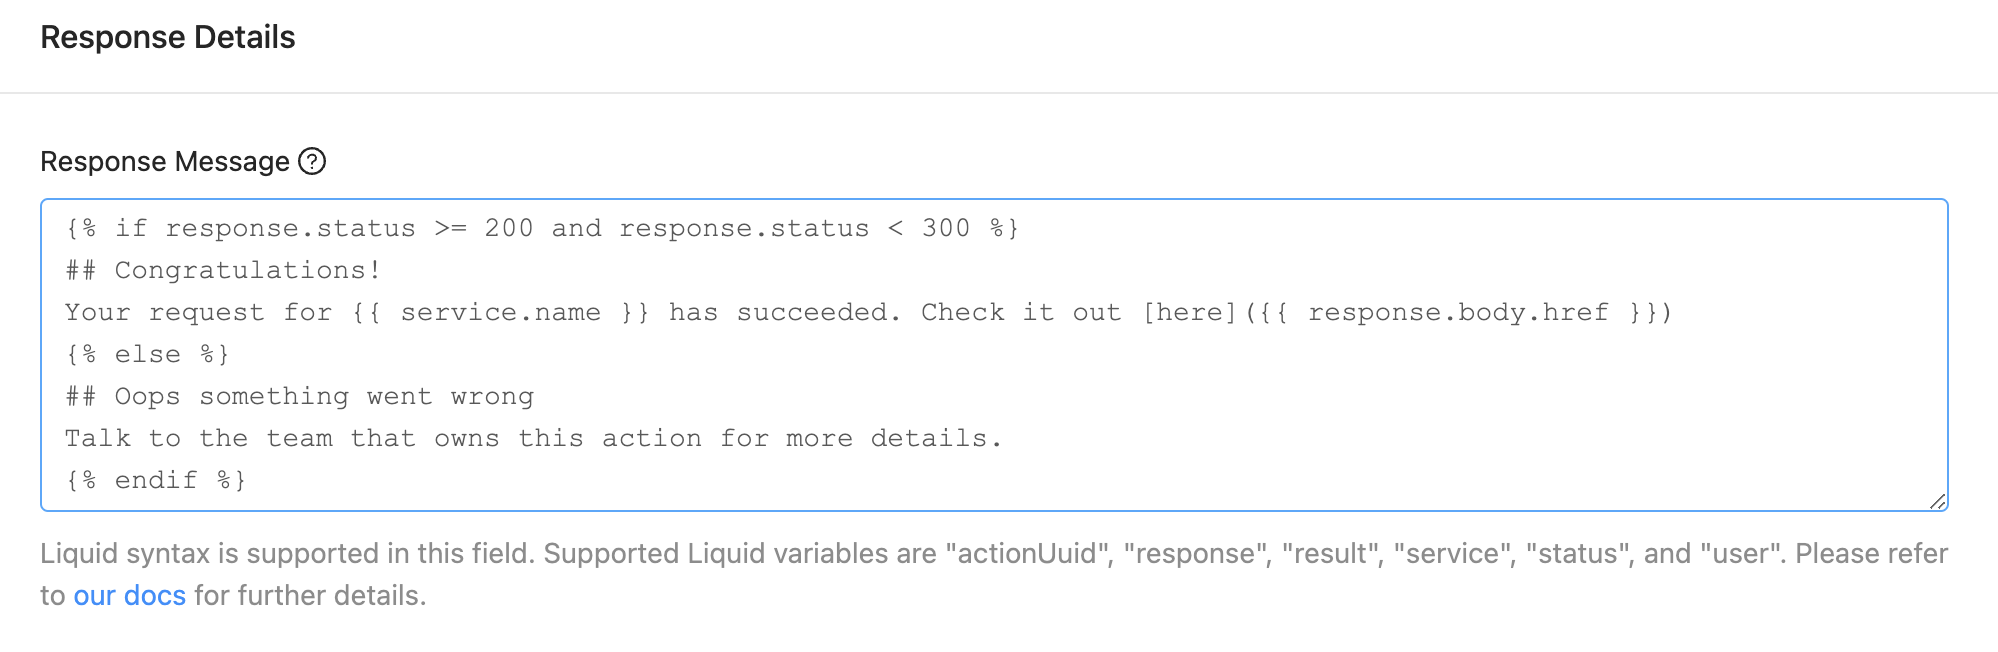
Response Details
An Action’s response details control what message is displayed to the invoking user after it has finished.
| Description | |
|---|---|
| Response Message | The message displayed to the invoking user after the HTTP request for the action has completed. The message can be conditionally changed based on the fields in the response via liquid templating. |
In the case of aynchronous actions only, the x-opslevel-action-uuid and action's status are available variables as the Liquid variables actionUuid and status as shown.
This field can also dynamically insert information from the action’s context into the message body.
See the Action Context Schema for the list of fields available and this example of how to use them.
Asynchronous status updates
Actions that require asynchronous status updates will show as "In Progress" until they receive a status or time out. You can send an additional JSON payload with the asynchronous status as mentioned above. For a complete example, see this page.
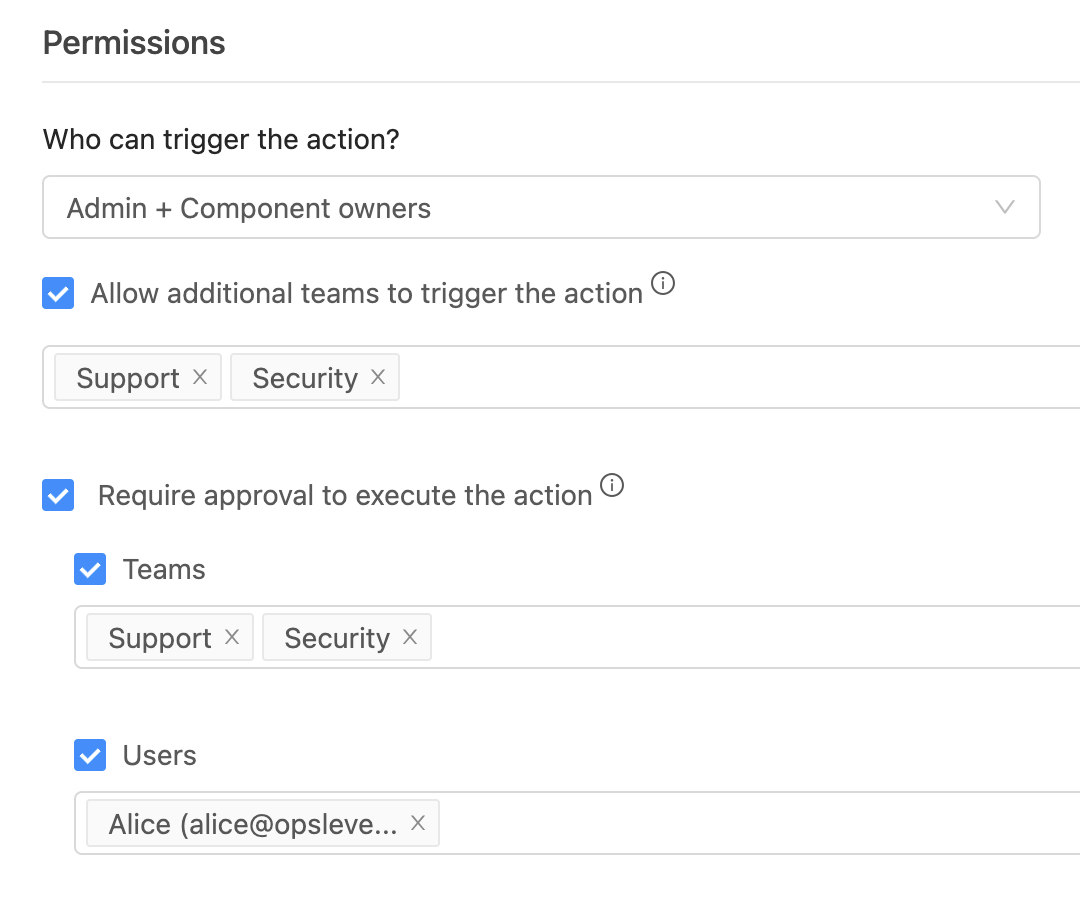
Permissions
While many actions can be taken by anyone in your organization, there are times when an action should be limited to a subset of your teams or require approval from a specific person or group. This section allows you to control who can trigger the action and designate approvers if needed.
| Description | |
|---|---|
| Who can trigger the action? | Control who has access to this action. Possible values are: Admin, Admin + Service owners, and Everyone. See below for more details on each option. |
| Allow additional teams to trigger the action | Only available if everyone is not already able to trigger the action. When enabled, you can add a specific list of teams whose members can also trigger the action. |
| Require approval to execute the action | When enabled, the action will require approval from one of the specified users or team members before it executes. |
| Who can trigger the action? | Description |
|---|---|
| Admin | Only users with the Admin role can trigger the action. * |
| Admin + Component Owners | Only members of the team who own the component or users with the Admin role can trigger the action. * Note: This action is only available if the action applies to a component. |
| Everyone | All OpsLevel users may trigger the action. |
| * | When this setting is used, the admin can also configure additional explicit teams that can trigger the action. |
Approving an Action
If an Action requires approval, all approvers will be notified via e-mail after the Action has been initiated. From the e-mail, click through to approve or deny the Action, or to view details. Approvers will also see a notification dot on the Self-Service menu item if there are Actions pending their attention.
Publishing
During development of the action, you can keep the action in a draft state so that only Admin users will be able to see and trigger it.
Once you've tested the action, come back to edit the action and set the Publish action toggle to true to make the action visible to all users and available to be triggered by the users outlined by your configured Action Privileges.

Note: Publishing an action is not a one-way transaction. If you decide to unpublish the action and give it additional development time, just turn the Publish action flag back to off.
What's Next?
Try creating an action from one of our templates or build out our end-to-end example from scratch.
Updated 7 months ago