Action Templates
Jump start your action library using OpsLevel Action Templates
When creating a new Action, you can use one of our action templates to enable your developers to take action from OpsLevel even faster.
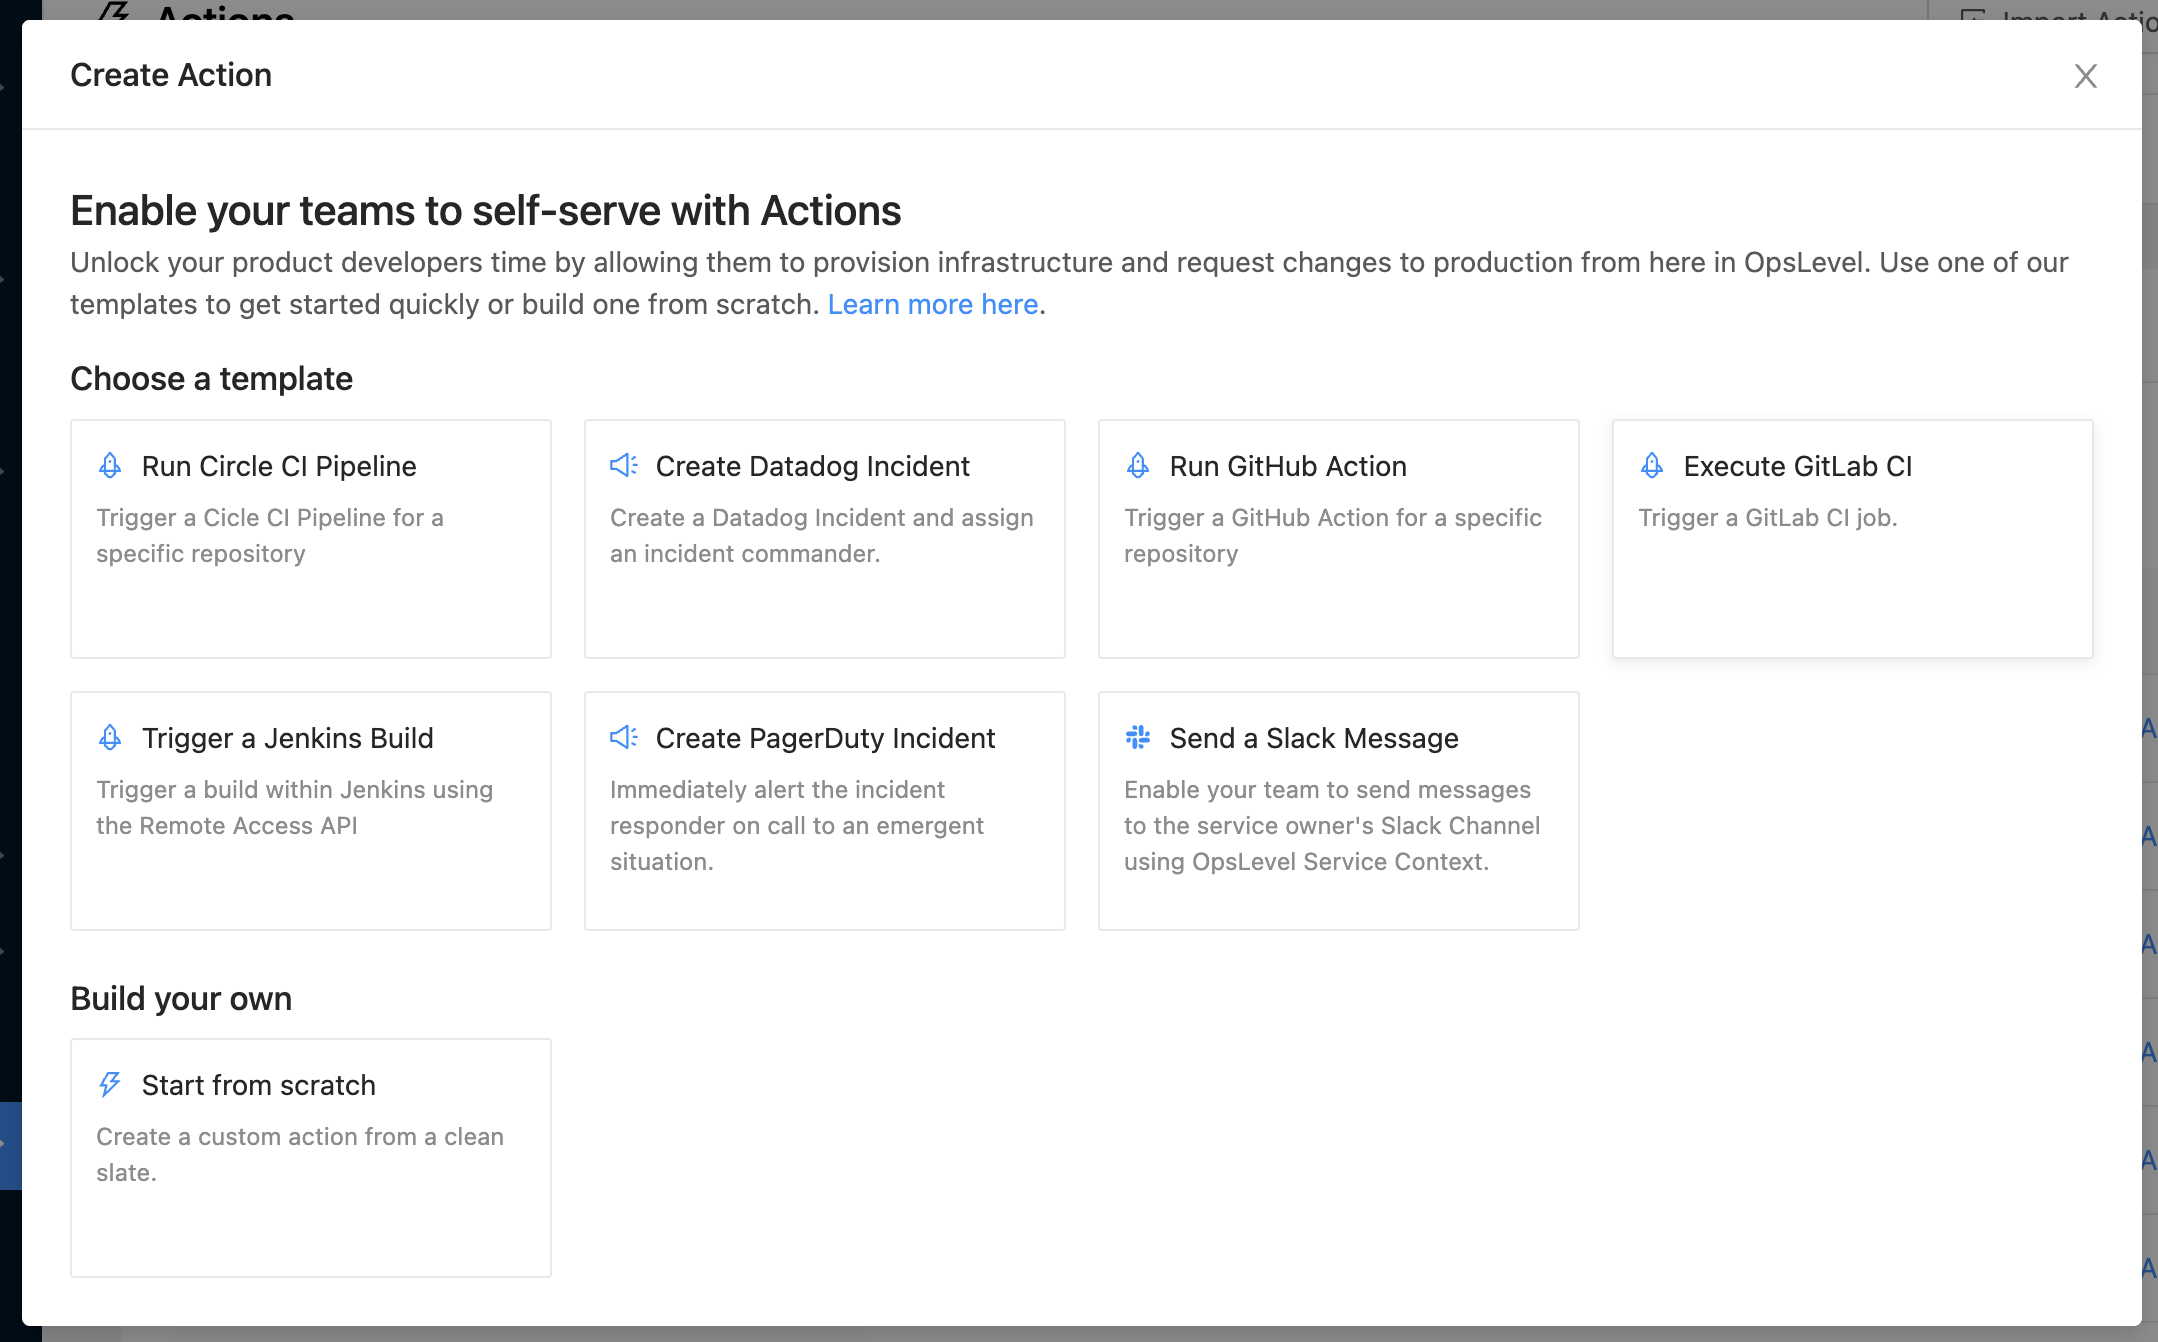
There are two main categories of templates:
- Actions that facilitate communication by allowing you to post messages to team channels or create incidents
- Actions that integrate with your CI/CD pipelines and jobs to enable self-service of operational tasks and streamline nearly any process.
If this is your first time with actions and you have access to a Slack workspace, we recommend that you start with the Send a Slack Message template.
Send a Slack Message
How does it Work?
When a user chooses to trigger this action, they are prompted for the message that they want to send to the team that owns the service.
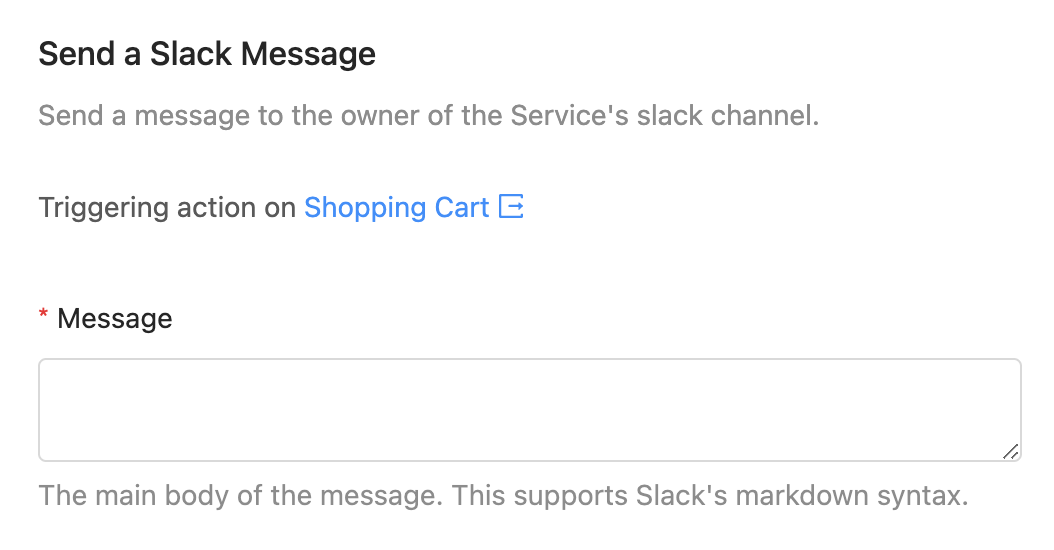
Once the user enters a message and executes the action, OpsLevel will identify if the related service has an owner with a Slack channel contact method. If it does, OpsLevel will send a message to that channel with the user defined message, the service name and the name of the user who triggered the action.

Setup Guide
In Slack
First, you'll need to create a Slack App with the correct scopes and features. We recommend that you start using the following manifest:
display_information:
  name: OpsLevel Actions
features:
  bot_user:
    display_name: OpsLevel Actions
    always_online: false
oauth_config:
  scopes:
    bot:
      - chat:write
      - chat:write.public
settings:
  org_deploy_enabled: false
  socket_mode_enabled: false
  token_rotation_enabled: false
Once the app is created, navigate to the app's OAuth & Permissions page and install the app to your workspace. Then copy the Bot User OAuth Token for use in the OpsLevel action configuration.
In OpsLevel
- Navigate to Settings > Manage Actions
- Press the New Action button
- Choose the Send a Slack Message action template card
- Set an Action Owner
- Ensure that the Does this action apply to services? toggle is enabled. Note: This template relies on service context, so if you want to change this setting you will also need to change how the channel is derived in the Payload field.
- In the Authorization Header, paste the Bot User OAuth Token from your Slack App
- Save the action.
Once the action is saved, you can test it out by navigating to Self-Service > Actions. Don't forget to publish the action when you're ready for non-admin users to trigger the action.
Note: If a related service does not have an owner or the owner doesn't have a Slack Channel configured, the template is configured to send the message to the #general channel. You can modify this by updating the webhook Payload configuration or creating a service filter to limit the action to services with appropriate owners.
Create Datadog Incident
How does it Work?
When a user chooses this action they'll be prompted for some common incident details, like a title, description, severity and the incident commander.
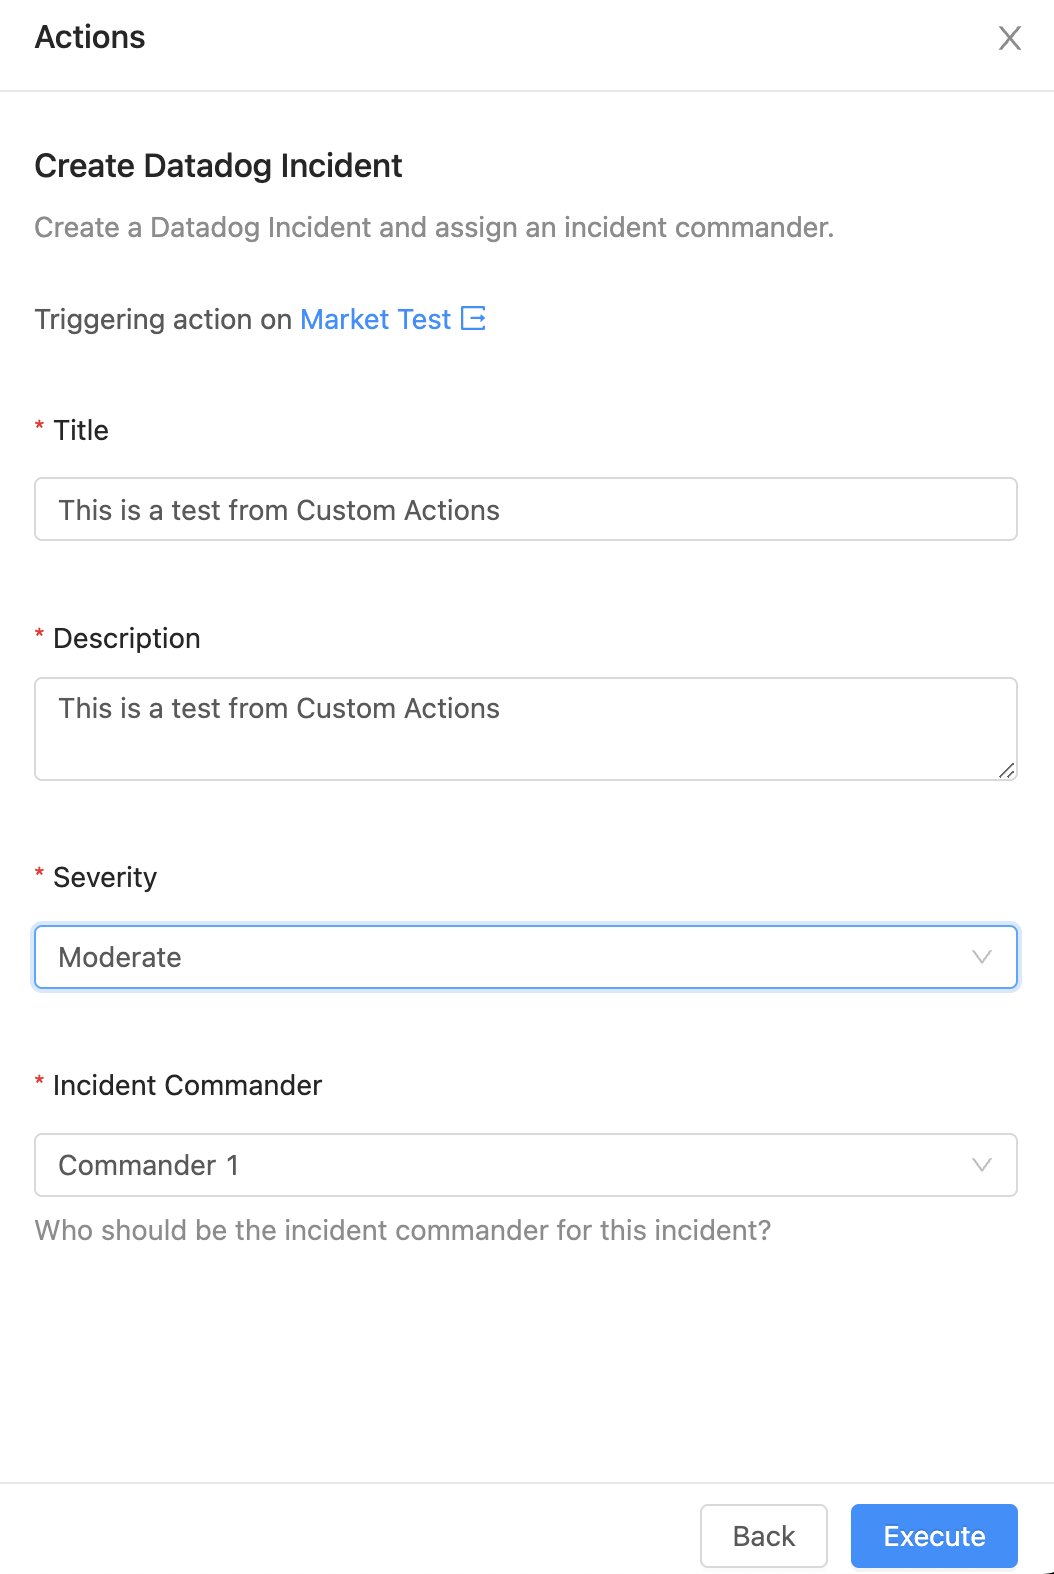
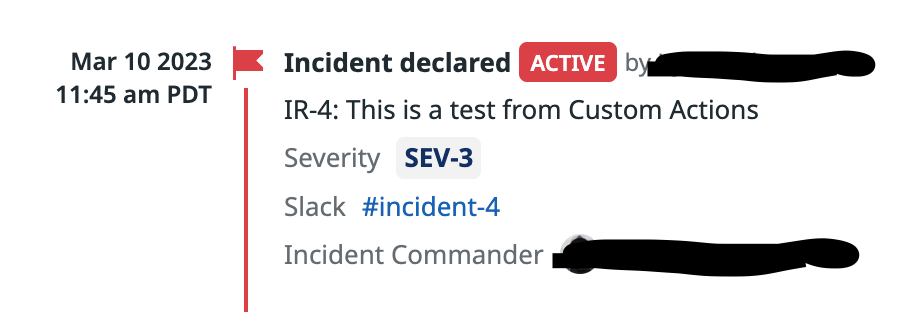
Once these details are entered and the user triggers the action, OpsLevel will send a POST to Datadog's Incident API.
Setup Guide
In Datadog
- You will need to create a Datadog Application Key and a Datadog API Key in order to configure the action in OpsLevel. To learn more about authenticating requests to the Datadog API and how to manage Datadog tokens, view their API documentation.
- You will also need one or more User IDs for the set of users that you want to make the Incident Commander.
In OpsLevel
- Navigate to Settings > Manage Actions
- Press the New Action button
- Choose the Create a Datadog Incident action template card
- Set an Action Owner
- In the Form Details field, replace the Incident Commander values array with the User IDs and display names that you want your users to choose between. For more information about how to configure manual inputs, see our guide.
- In the DD-API-KEY Header, paste the Datadog API Token you created earlier.
- In the DD-APPLICATION-KEY Header, paste the Datadog Application Token you created earlier.
- Save the action.
Once the action is saved, you can test it out by navigating to Self-Service > Actions. Don't forget to publish the action when you're ready for non-admin users to use the action.
Note: This action doesn't require any service context by default, so you can choose to disable the Does this action apply to services? toggle in the Action Rules configuration.
Create PagerDuty Incident
How does it Work?
When a user chooses this action they'll be prompted for some common Incident details, like a title and description.
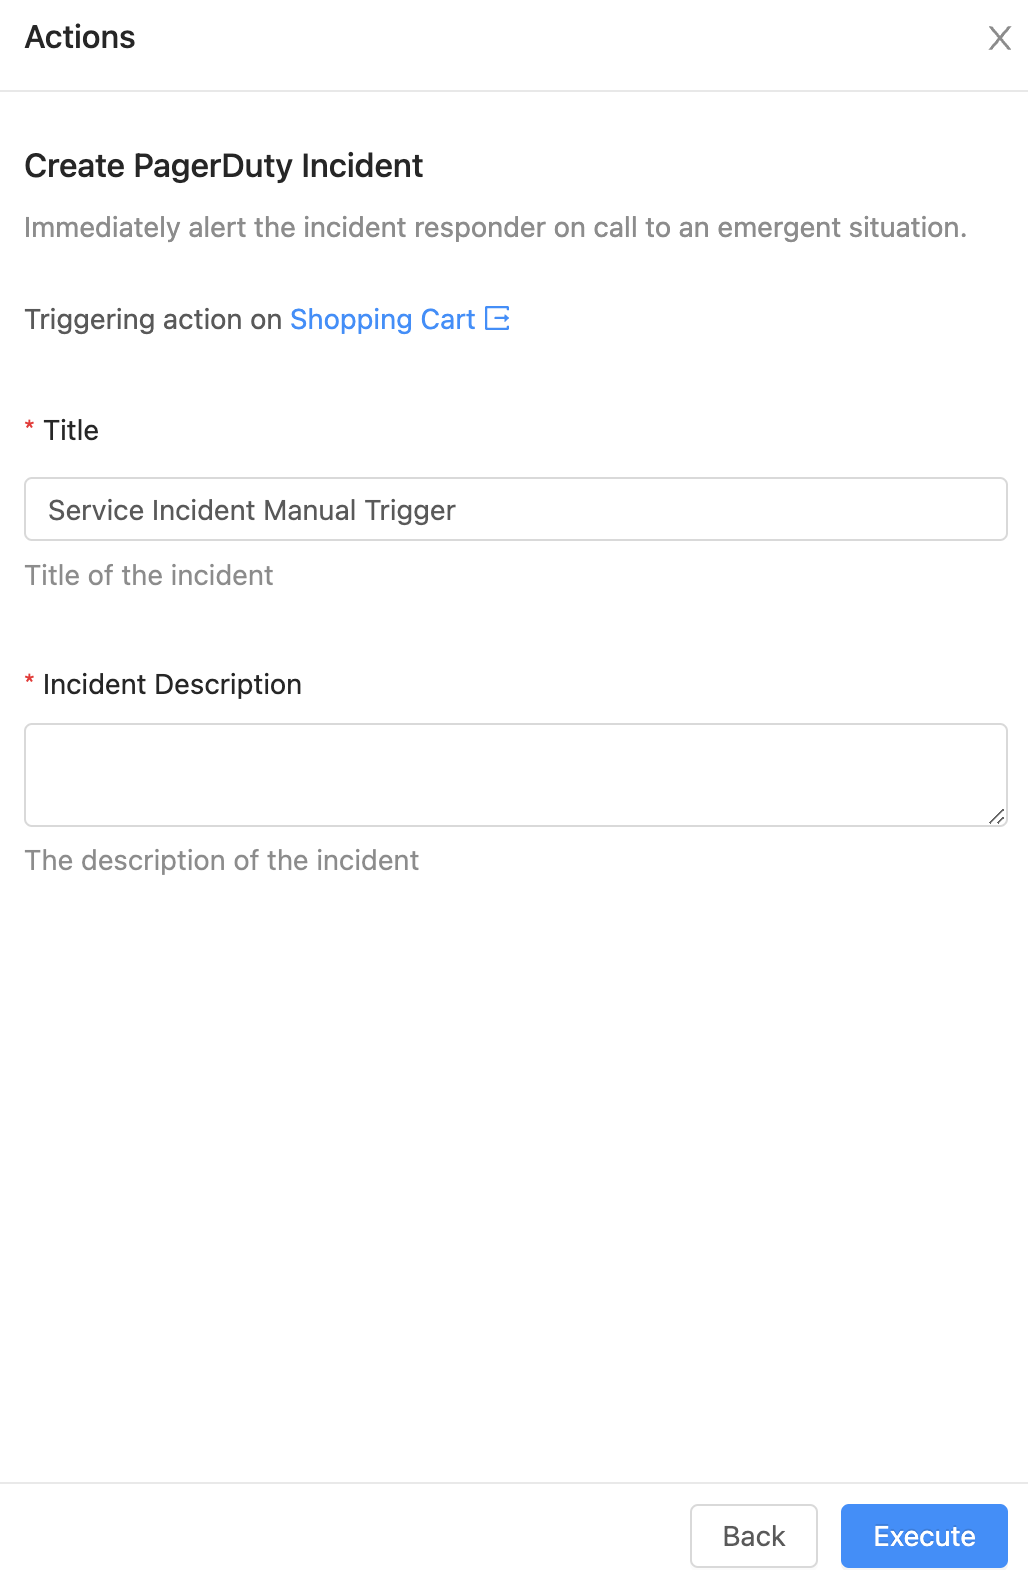
Once these details are entered and the user triggers the action, OpsLevel will send a POST to PagerDuty's Incident API. It uses a tag value on the related OpsLevel service to identify which PagerDuty service to route the incident to and adds information about the user who triggered the action to Incident body in PagerDuty.
Setup Guide
In PagerDuty
- You will need to create a PagerDuty API Token in order to configure the action in OpsLevel. To learn more about authenticating requests to the PagerDuty API and how to manage PageDuty API Tokens, view their API documentation.
- You will also need one or more Service IDs for the set of services that you want to create incidents for.
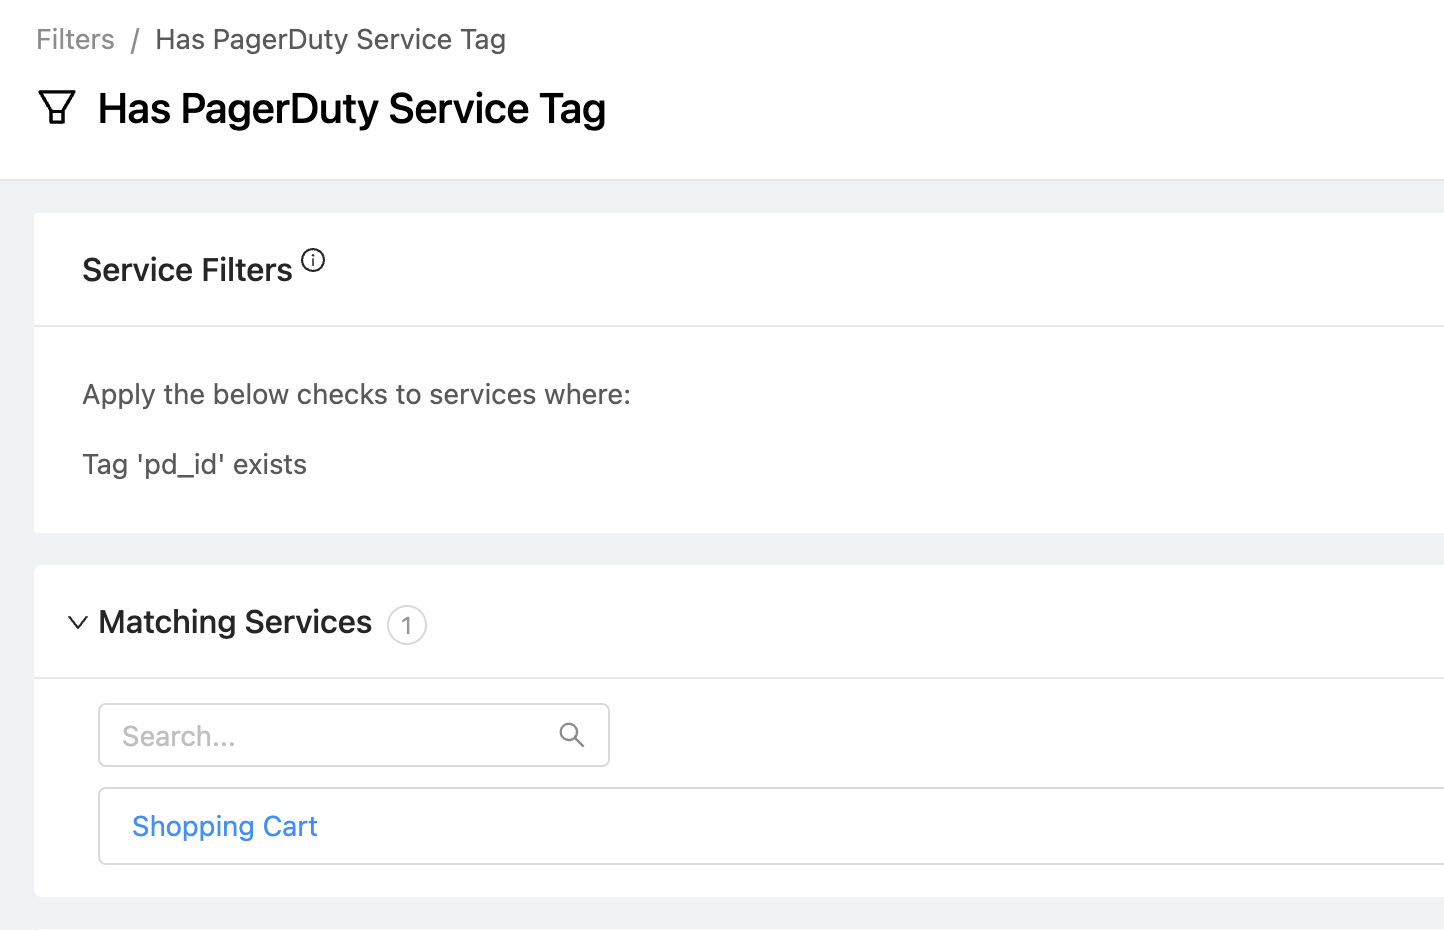
Prepare Services In OpsLevel
- For each OpsLevel service that you want to allow users to create incidents for, add a new
pd_idtag whose value will be the ID of the PagerDuty service where the incident should be routed to. - Create a new Filter in OpsLevel that only includes services where the
pd_idtag is set.
Create the Action in OpsLevel
- Navigate to Settings > Manage Actions
- Press the New Action button
- Choose the Create a PagerDuty Incident action template card
- Set an Action Owner
- Ensure that the Does this action apply to services? toggle is enabled. Note: This template relies on service context, so if you want to change this setting you will also need to change how the PagerDuty service is derived in the Payload field.
- To avoid liquid errors when the action is run, set the Service Filter to the filter you defined above (for example,
Has PagerDuty Service Tag) - In the Authorization Header, paste the PagerDuty API Token you created earlier.
- In the From Header, enter the email address of the user who created the PagerDuty API Token earlier.
- Save the action.
Once the action is saved, you can test it out by navigating to Self-Service > Actions. Don't forget to publish the action when you're ready for non-admin users to trigger the action.
Note: If you'd prefer to configure the PagerDuty action without an OpsLevel Service <> PagerDuty Service mapping via the pd_id service tag, you can modify the action to always send to the same PagerDuty service by modifying the action's Payload field.
Run CircleCI Pipeline
How does it Work?
When a user chooses this action they'll be prompted for if they want to run the deploy and/or build pipelines for the service that the action is being triggered against.

Once these details are entered and the user triggers the action, OpsLevel will send a POST to CircleCI's Trigger Pipeline API. It derives the pipeline identifier based on the primary repository connected to the service.
Setup Guide
In CircleCI
- You will need to create a CircleCI API Token in order to configure the action in OpsLevel. To learn more about authenticating requests to CircleCI and how to manage CircleCI tokens view their API documentation.
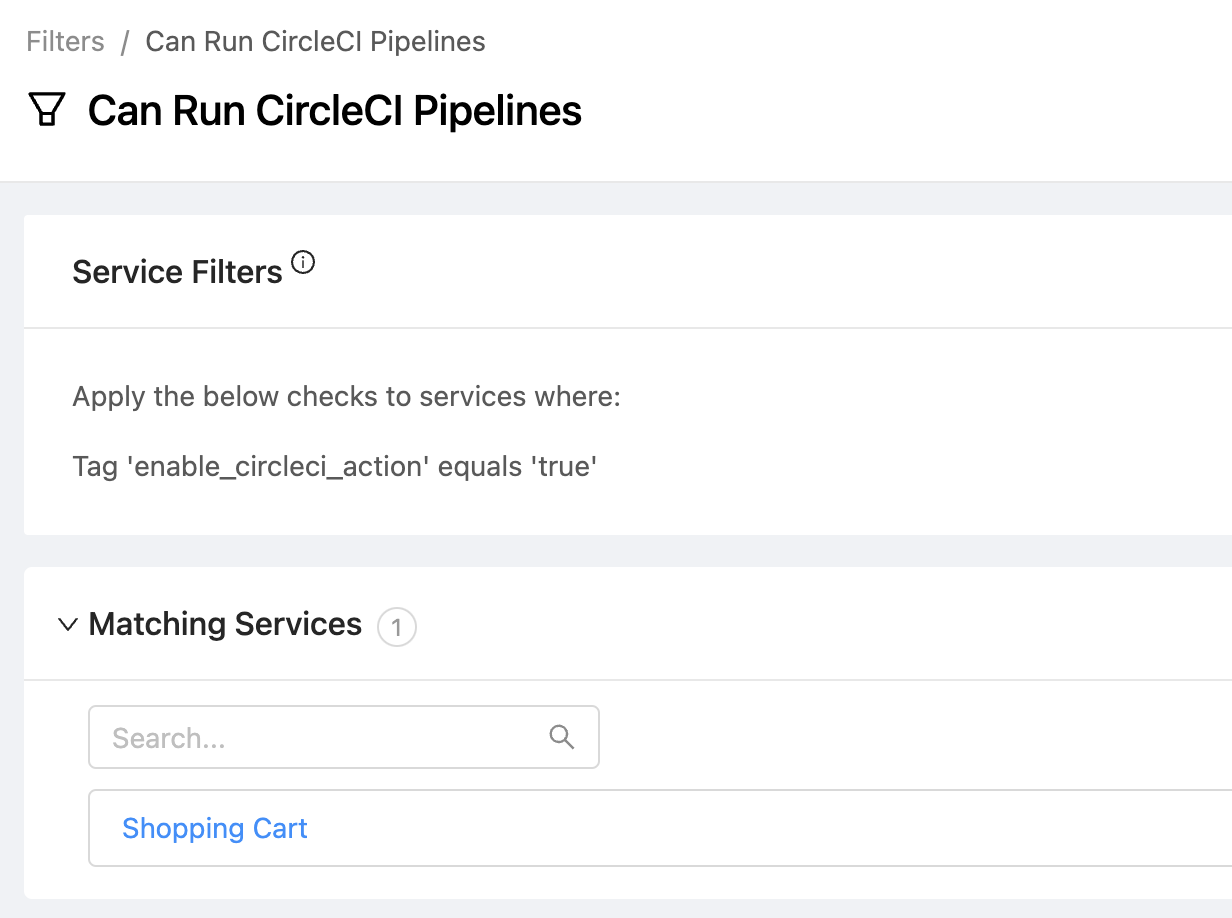
Prepare Services In OpsLevel
- For each OpsLevel Service that should support the Run CircleCI Pipeline action, add a new
enable_circleci_actiontag whose value will betrue. Note: the CircleCI template expects the service's build and deploy pipelines to be found in a project related the service's primary repository. For more information about configuring Service <> Repository mappings, see our guide. - Create a new Filter in OpsLevel that only includes services where the
enable_circleci_actiontag is set to true.
Create the Action in OpsLevel
- Navigate to Settings > Manage Actions
- Press the New Action button
- Choose the Run CircleCI Pipeline action template card
- Set an Action Owner
- Ensure that the Does this action apply to services? toggle is enabled. Note: This template relies on service context, so if you want to change this setting you will also need to change how the CircleCI pipeline's project is derived in the Webhook URL field.
- To avoid liquid errors when the action is run, set the Service Filter to the filter you defined above (for example,
Can Run CircleCI Pipelines) - In the Circle-Token Header, paste the CircleCI API Token you created earlier.
- Save the action.
Once the action is saved, you can test it out by navigating to Self-Service > Actions. Don't forget to publish the action when you're ready for non-admin users to trigger the action.
Execute GitLab CI
How does it Work?
When a user chooses this action they'll be prompted for a message to explain why they are executing the pipeline.
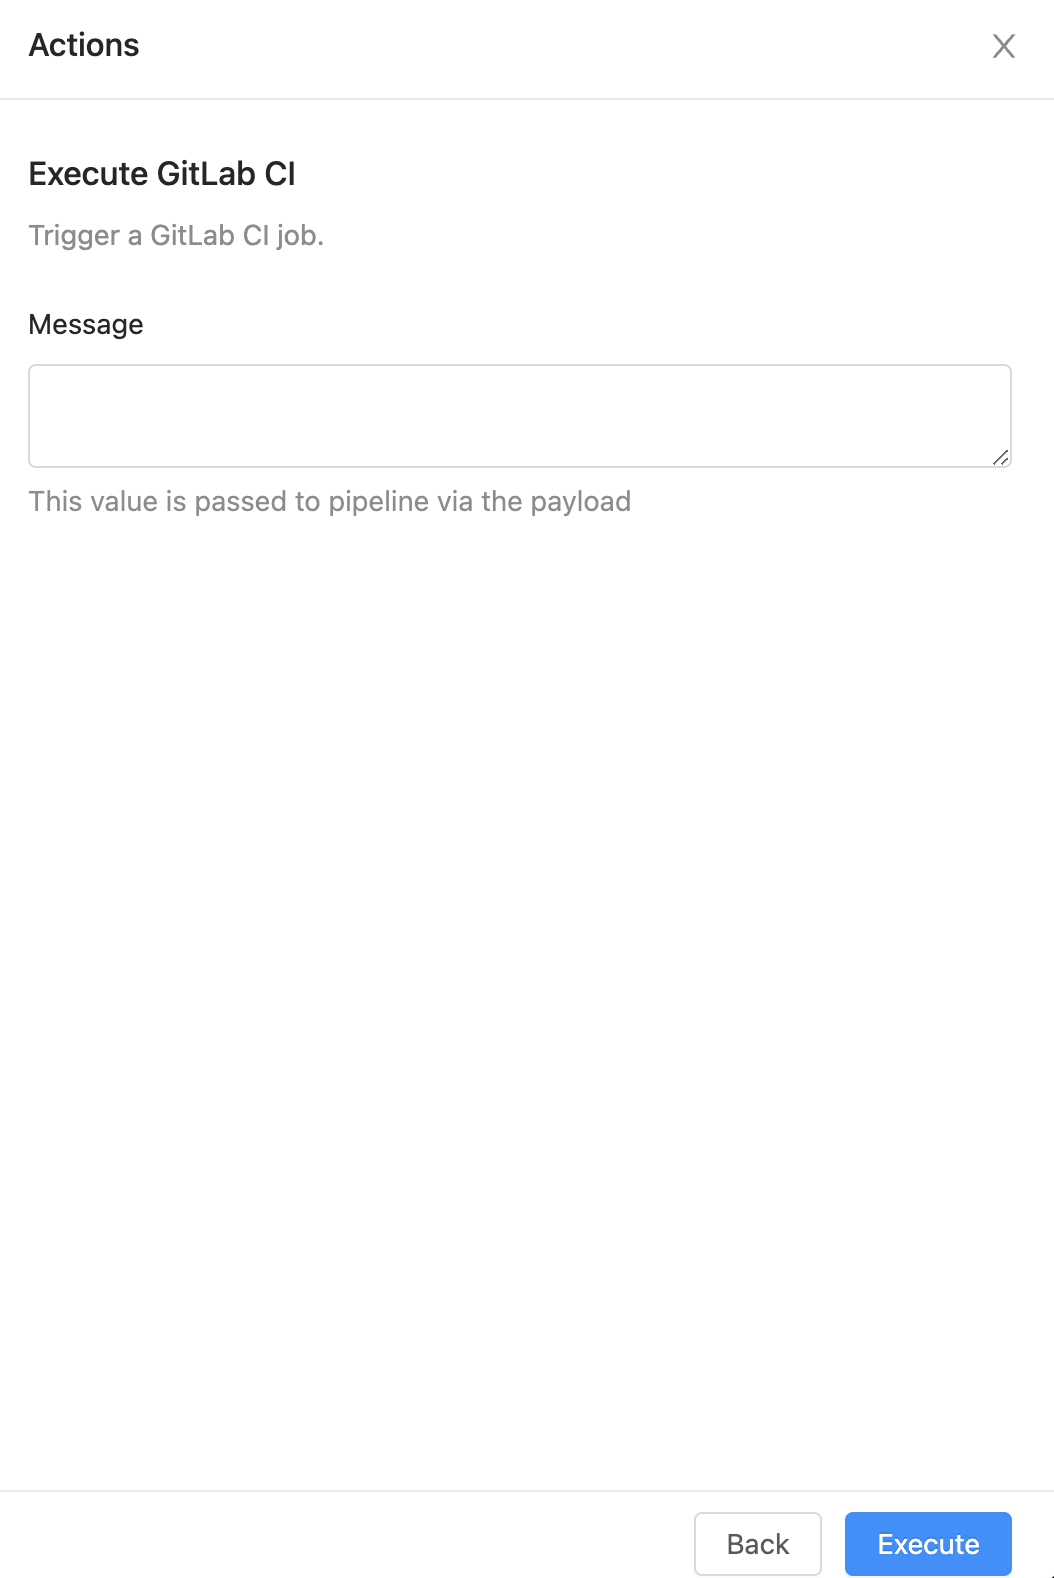
Once these details are entered and the user triggers the action, OpsLevel will send a POST to GitLab's Trigger Pipeline API. It derives the GitLab project identifier based on the primary repository connected to the Service.
Setup Guide
In GitLab
- You will need to create a GitLab Trigger Token in order to configure the action in OpsLevel. To learn more about authenticating requests to GitLab and how to manage trigger tokens view their API documentation.
Prepare Services In OpsLevel
- For each OpsLevel service that should support the Execute GitLab CI action, add a new
enable_gitlabci_actiontag whose value will betrue. Note: the CircleCI template expects the service's build and deploy pipelines to be found in a project related the service's primary repository. For more information about configuring Service <> Repository mappings, see our guide. - Create a new Filter in OpsLevel that only includes services where the
enable_gitlabci_actiontag is set to true.
Create the Action In OpsLevel
- Navigate to Settings > Manage Actions
- Press the New Action button
- Choose the Execute GitLab CI action template card
- Set an Action Owner
- Ensure that the Does this action apply to services? toggle is enabled. Note: This template relies on service context, so if you want to change this setting you will also need to change how the GitLab project is derived in the Webhook URL field.
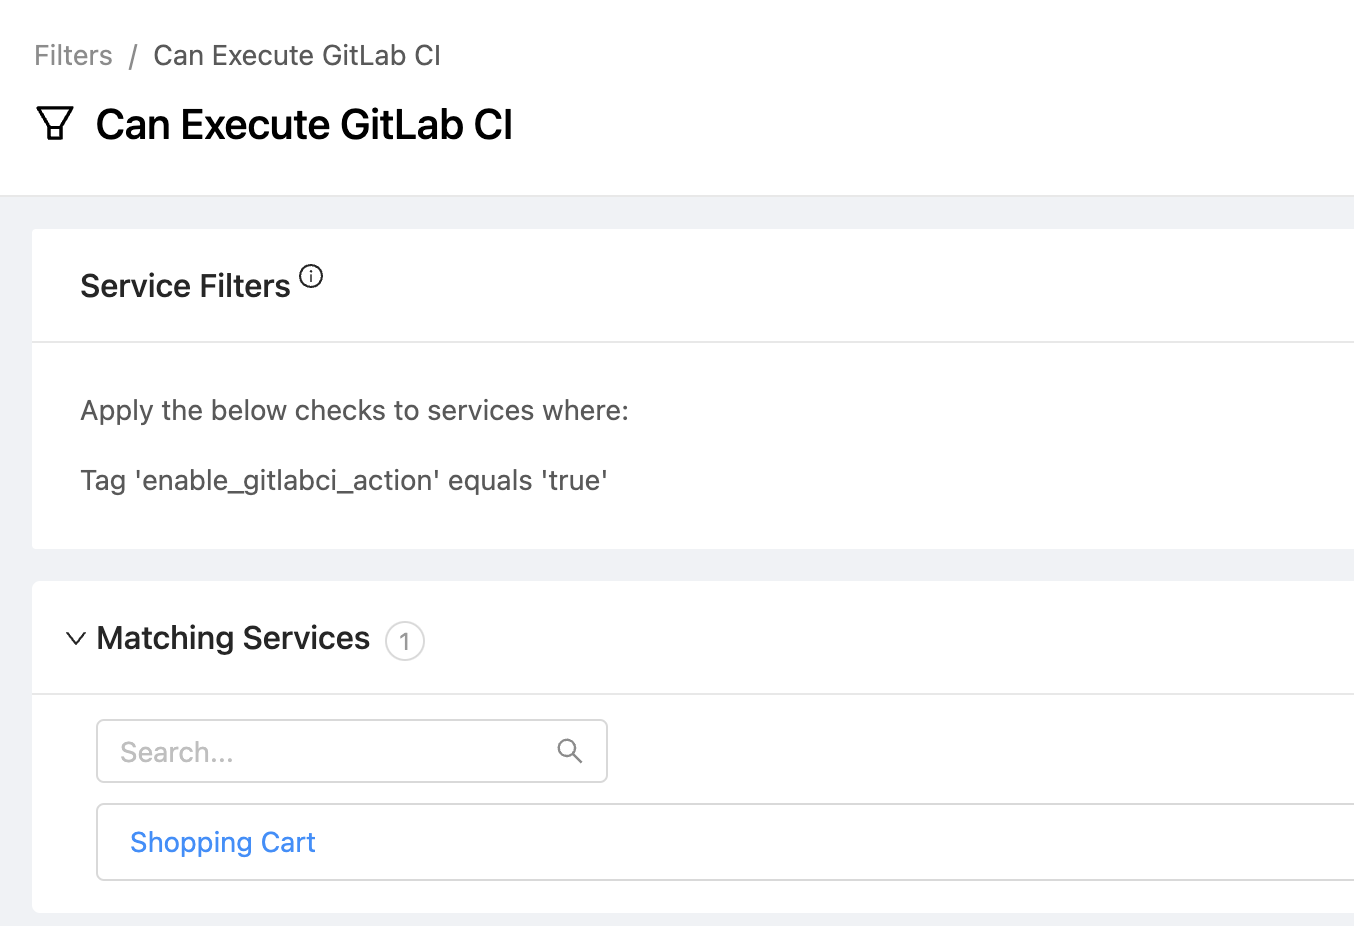
- To avoid liquid errors when the action is run, set the Service Filter to the filter you defined above (for example,
Can Execute GitLab CI) - In the Payload field, paste the GitLab Trigger Token you created earlier to replace the
<GITLAB-TOKEN>in the second line. - Save the action.
Once the action is saved, you can test it out by navigating to Self-Service > Actions. Don't forget to publish the action when you're ready for non-admin users to trigger the action.
Note: Message is an example of a variable you can pass to the pipeline, but you can add your own additional manual inputs, service context or hard-coded values to the payload sent to GitLab. For more information about how to customize the action's configuration, see our guide to creating your first action.
Run GitHub Action
How does it Work?
When a user chooses this action they'll be prompted for a message to explain why they are running the GitHub Action.
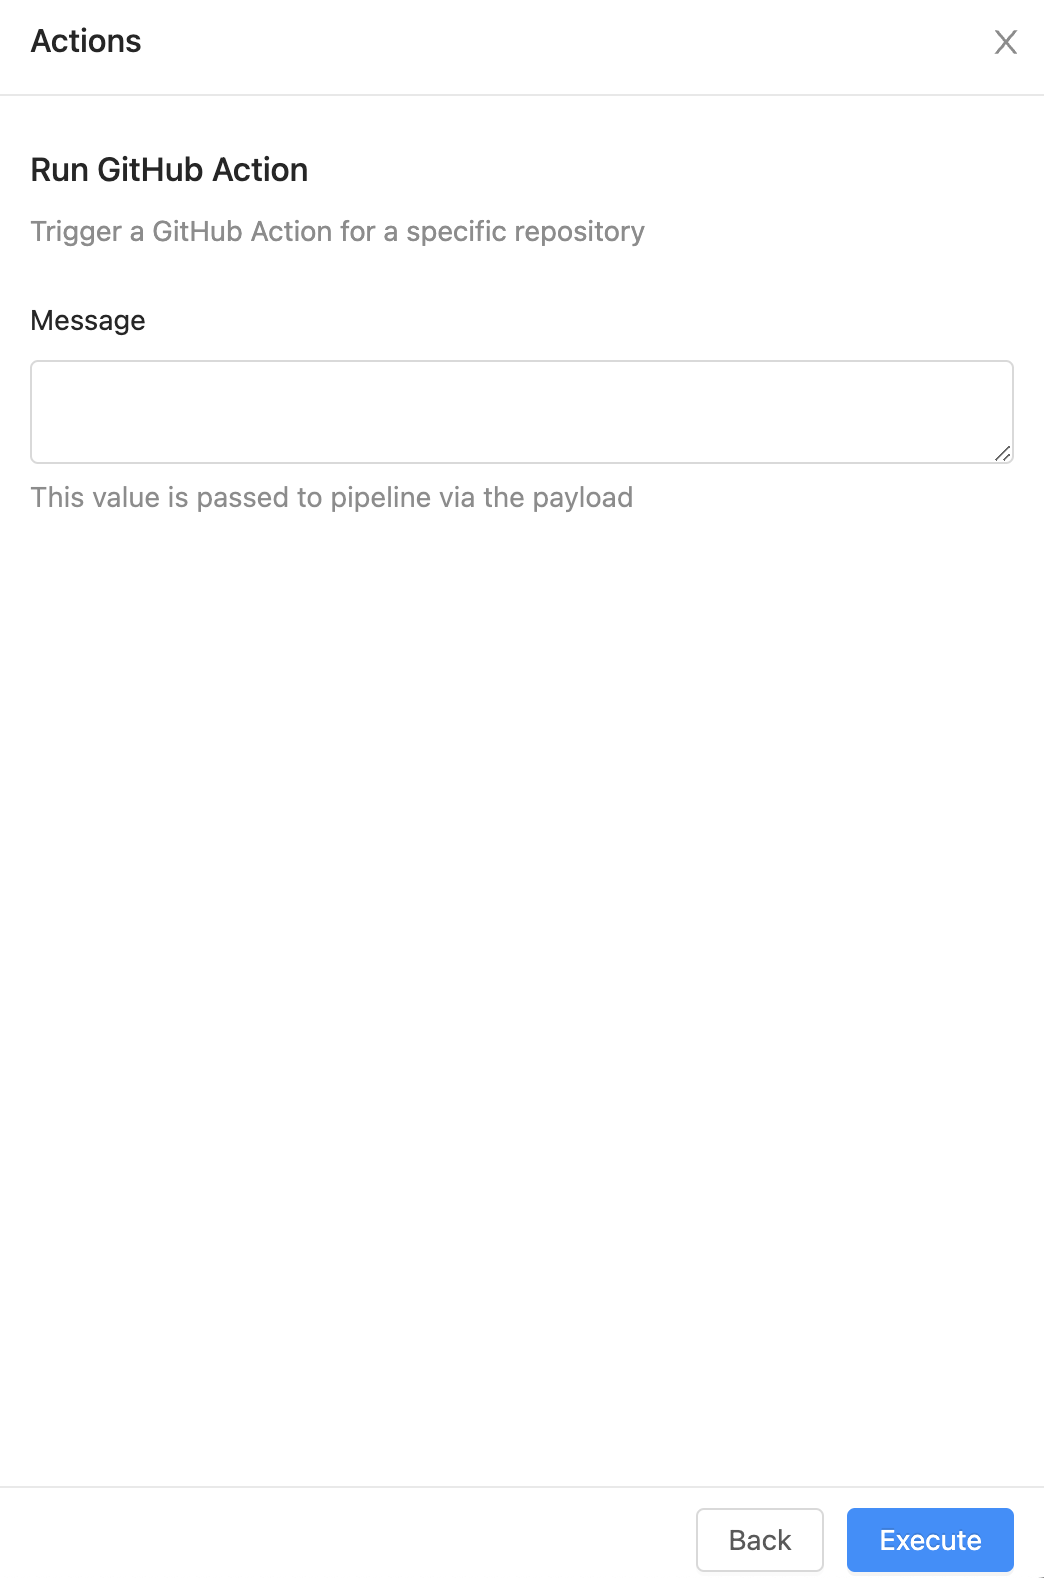
Once these details are entered and the user triggers the action, OpsLevel will send a POST to GitLab's Create Workflow Dispatch Event API. It derives the GitHub repository identifier based on the primary repository connected to the Service.
Setup Guide
In GitHub
- You will need to create a GitHub Access Token in order to configure the action in OpsLevel. To learn more about authenticating requests to GitLab and how to manage trigger tokens view their API documentation.
Prepare Services In OpsLevel
- For each OpsLevel service that should support the Run GitHub Action action, add a new
enable_run_github_actiontag whose value will betrue. Note: the CircleCI template expects the service's build and deploy pipelines to be found in a project related the service's primary repository. For more information about configuring Service <> Repository mappings, see our guide. - Create a new Filter in OpsLevel that only includes services where the
enable_run_github_actiontag is set to true.
Create the Action In OpsLevel
- Navigate to Settings > Manage Actions
- Press the New Action button
- Choose the Run GitHub Action Action Template card
- Set an Action Owner
- Ensure that the Does this action apply to services? toggle is enabled. Note: This template relies on service context, so if you want to change this setting you will also need to change how the GitHub repository is derived in the Webhook URL field.
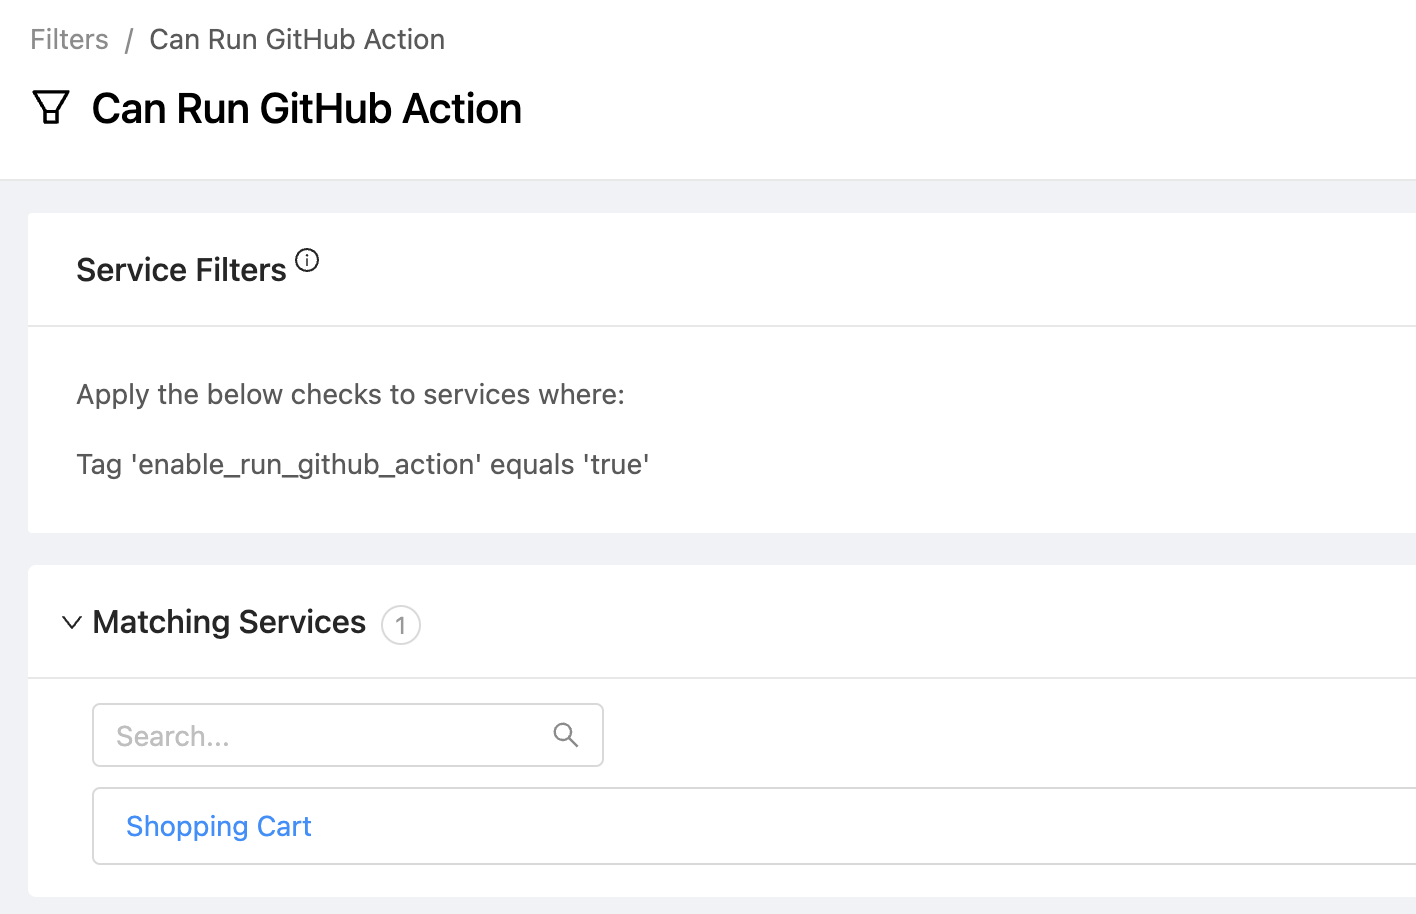
- To avoid liquid errors when the action is run, set the Service Filter to the filter you defined above (for example,
Can Run GitHub Action) - In the Authorization Header, paste the GitHub Access Token you created earlier.
- Save the action.
Once the action is saved, you can test it out by navigating to Self-Service > Actions. Don't forget to publish the action when you're ready for non-Admins to use the action.
Note: Message is an example of a variable you can pass to the workflow, but you can add your own additional manual inputs, service context or hard-coded values to the payload sent to GitHub. For more information about how to customize the action's configuration, see our guide to creating your first action.
Trigger Jenkins Pipeline
How does it Work?
When a user chooses this action they'll be prompted to enter the name of the Jenkins job they wish to trigger and the value of a build parameter named parameter1.
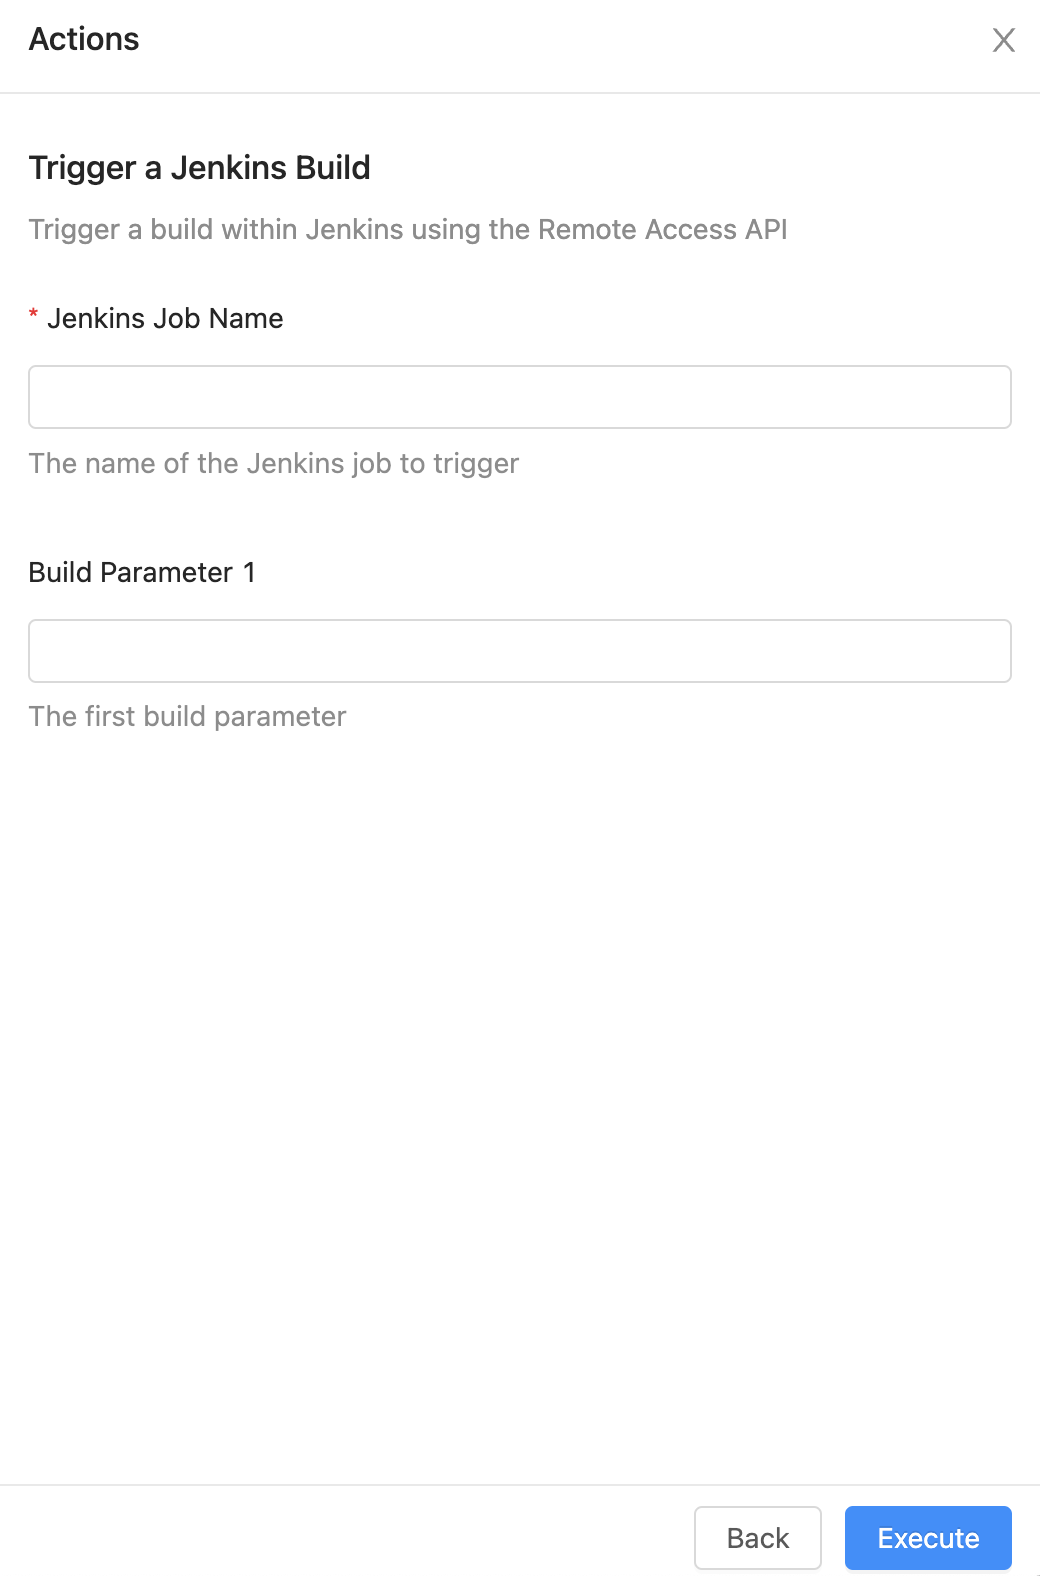
Once these details are entered and the user triggers the action, OpsLevel will send a POST to Jenkin's Remote Access API.
Setup Guide
In Jenkins
- You will need to create a Jenkins Access Token in order to configure the action in OpsLevel. To learn more about authenticating requests to Jenkins, and how to manage tokens view their Authentication documentation.
- Your Jenkins instance will need to be publicly accessible so that OpsLevel's request can reach it.
- The Jenkins jobs or pipelines you wish to run will need to be enabled for remote triggering.
Create the Action In OpsLevel
- Navigate to Settings > Manage Actions
- Press the New Action button
- Choose the Trigger Jenkins Pipeline action template card
- Set an Action Owner
- In the Webhook URL field, replace
<JENKINS_URL>with the domain where your Jenkins instance can be accessed by OpsLevel. - In the Webhook URL field, replace
TEST_API_TOKENwith the Jenkins Access Token you created earlier. - Save the action.
Once the action is saved, you can test it out by navigating to Self-Service > Actions. Don't forget to publish the action when you're ready for non-admin users to trigger the action.
Note: While the necessary context in this action template is entered manually by a user, you could modify this to use service context like tags or hard-coded values. You can also modify the request to not send any build parameters if none are required.
Updated 7 months ago