Jira Software
Create Jira issues from OpsLevel Checks, import context into the issues, and link to the Jira issues directly from your maturity report.
Why Integrate with Jira?
Integrating OpsLevel with Jira Software makes it easier and faster to improve your service’s maturity using your existing Jira workflow.
We’ll automatically include context about the Checks, Service, and any other relevant information in the Jira issue.
How it Works
Once you’ve installed the integration, you’ll be able to create Jira issues directly from your service’s maturity report. Issues can be created using failing and unevaluated checks.
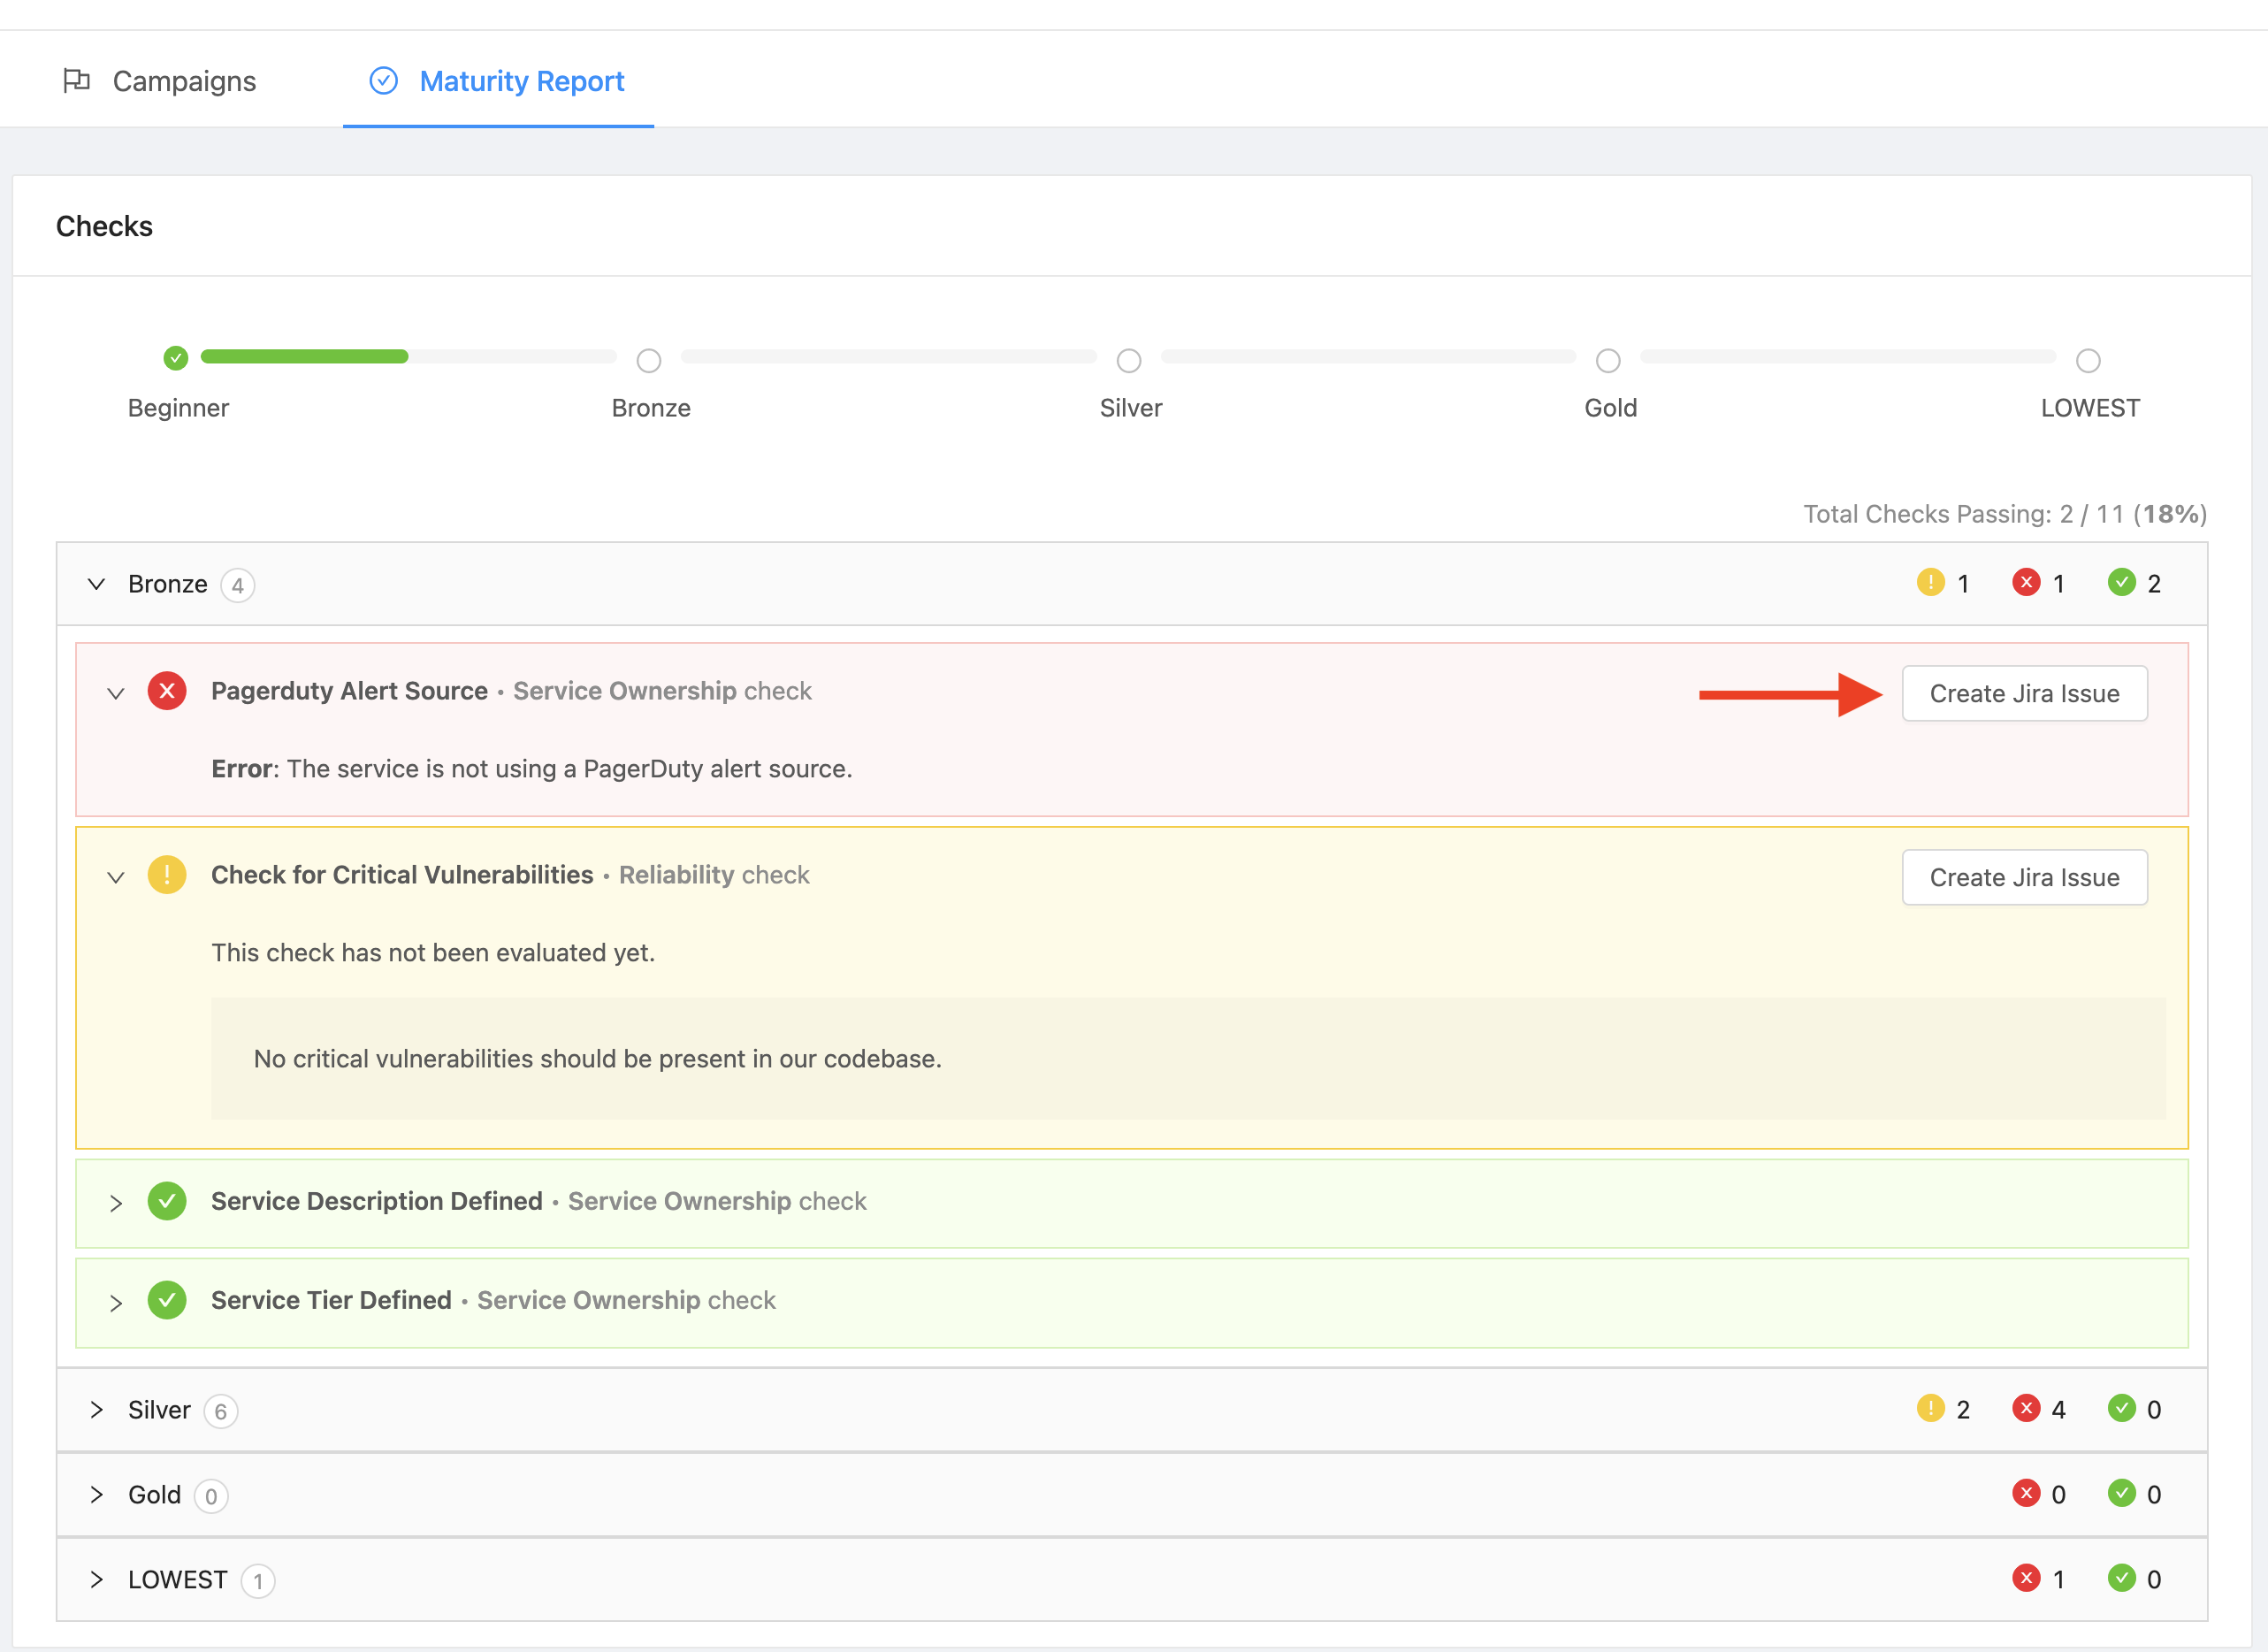
You can create an issue in Jira containing information about this Check and Service by clicking on the Create Issue button.
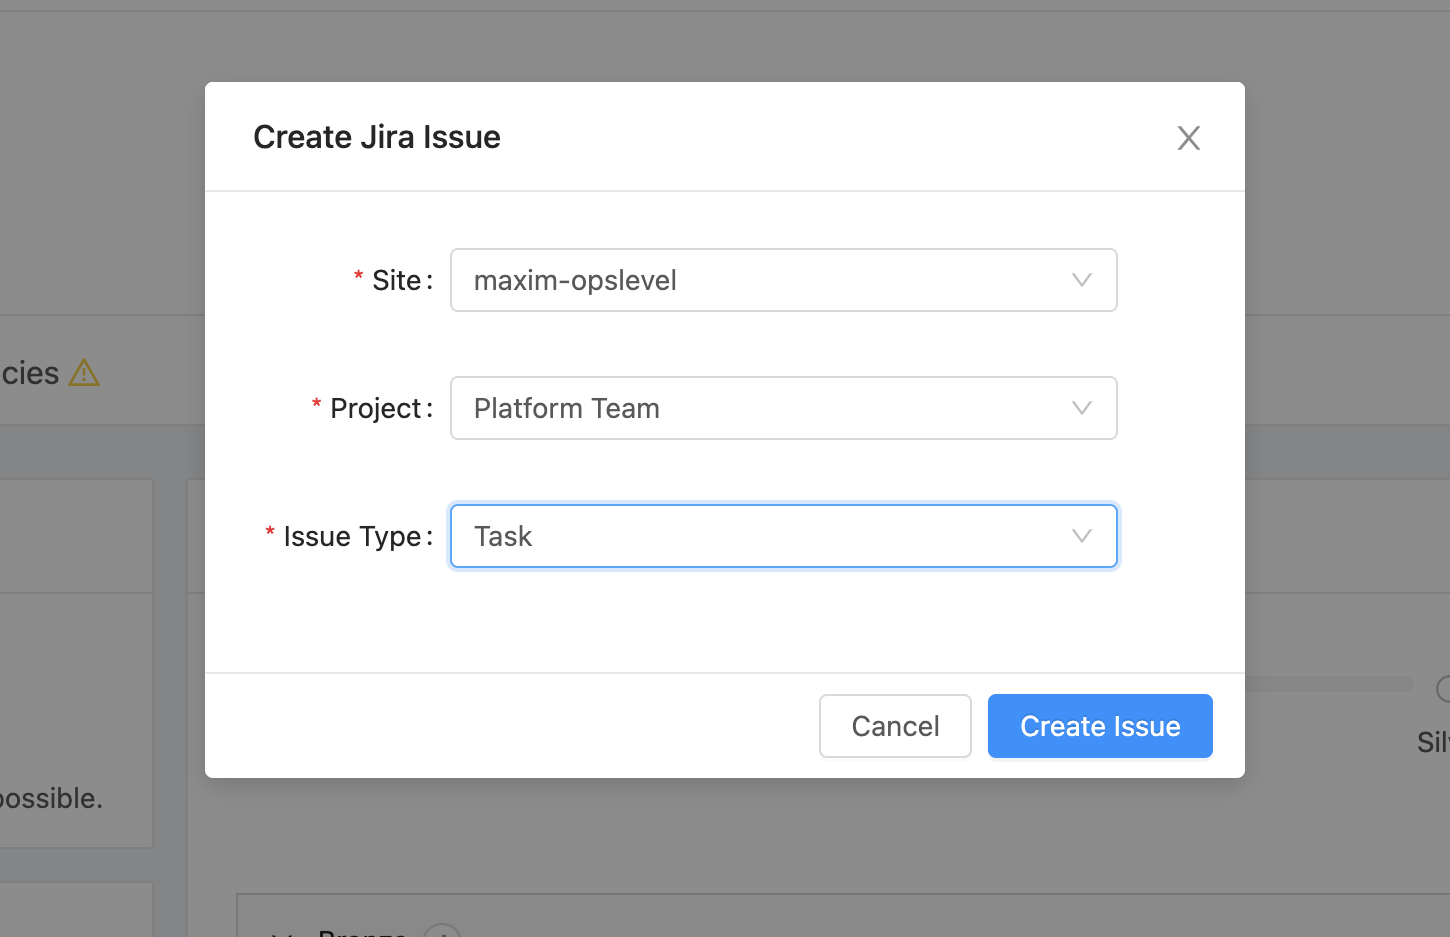
You’ll be presented with a modal to select which Jira site (if you’ve integrated with multiple), project, and issue type you’d like to create.
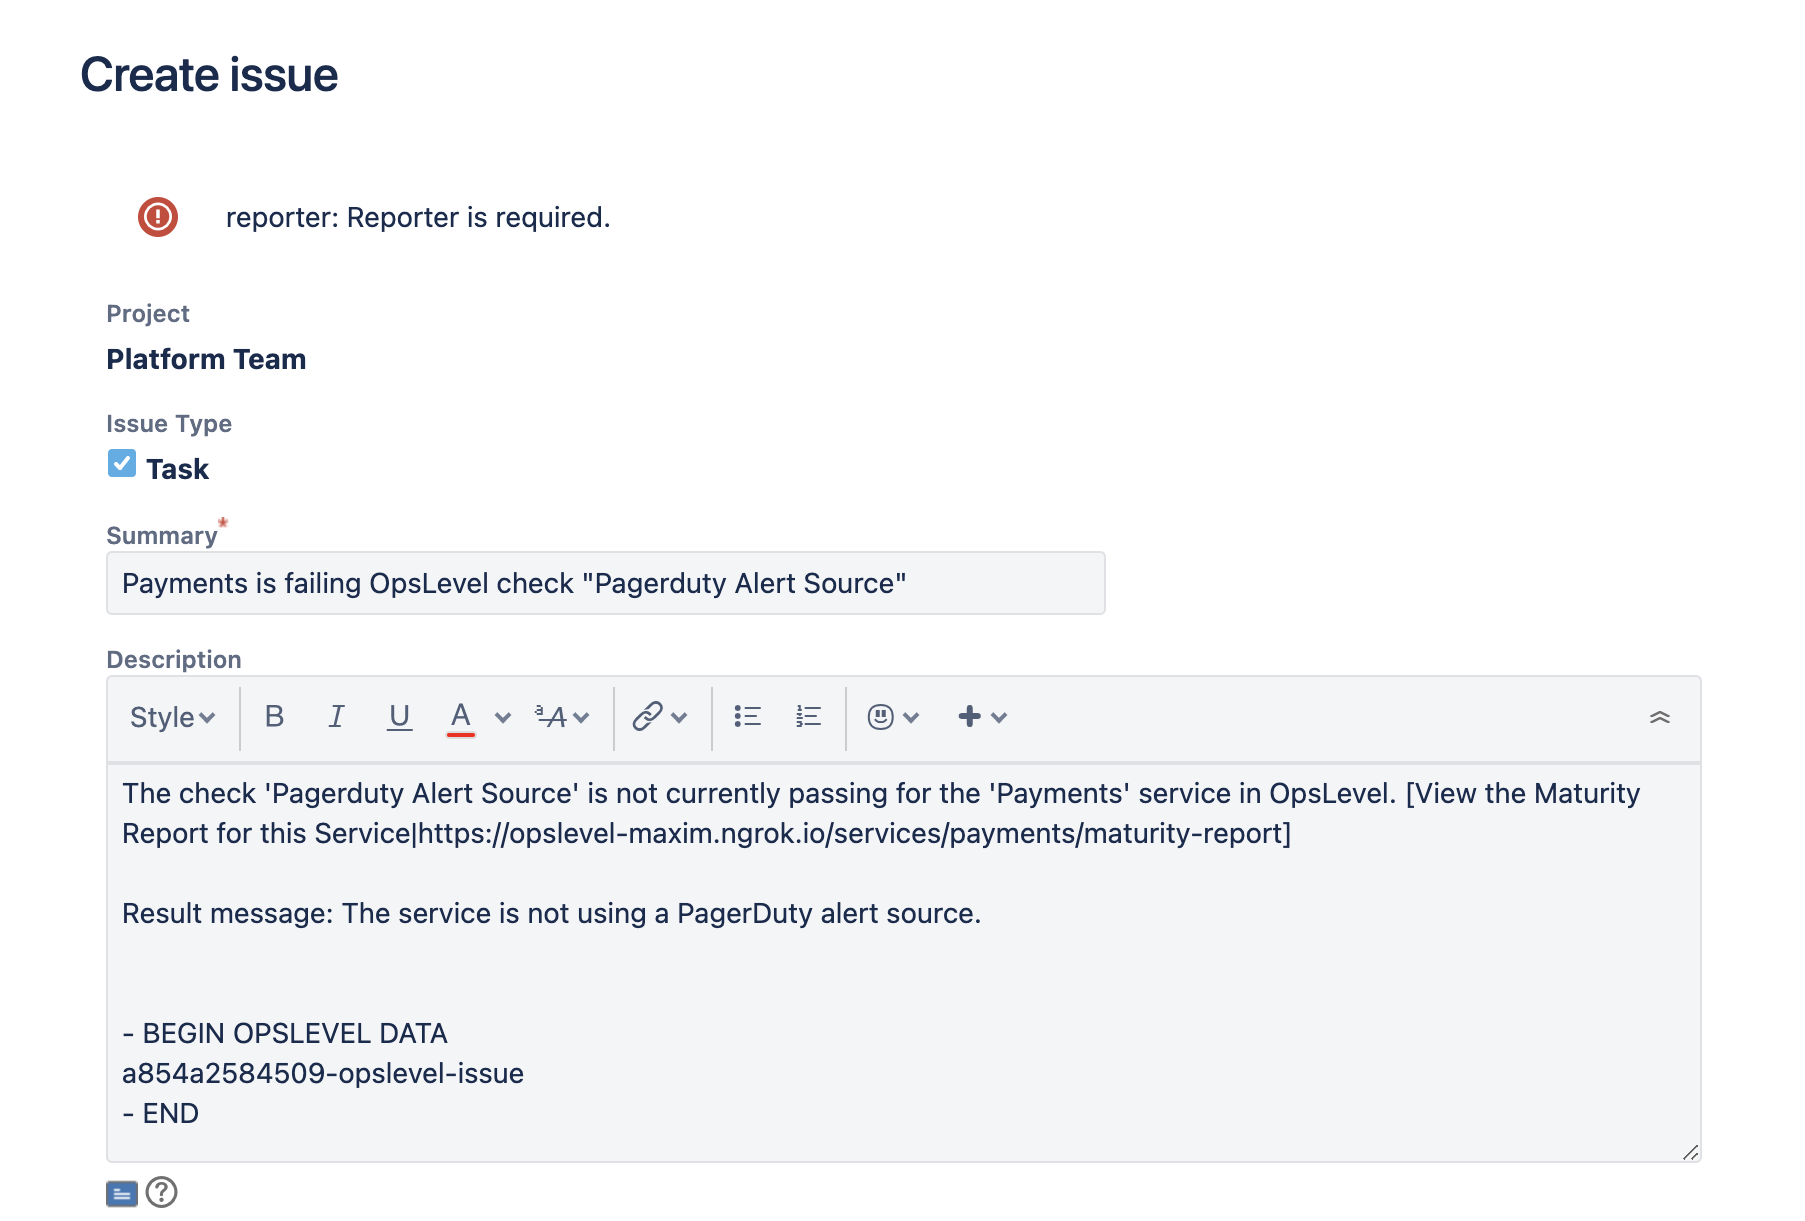
After filling out the required fields and clicking the Create Issue button, a new tab will be opened in your Jira site to finish filling out the rest of the fields for the issue.
Note: We inject a block of text that include some data that helps us map Jira issues back to OpsLevel. You’ll note that it begins with a BEGIN and END block, we ask that you do not change this as it will break the connection between OpsLevel and Jira.
Once the Jira issue is created, we’ll provide a link to it from your Service’s maturity report.
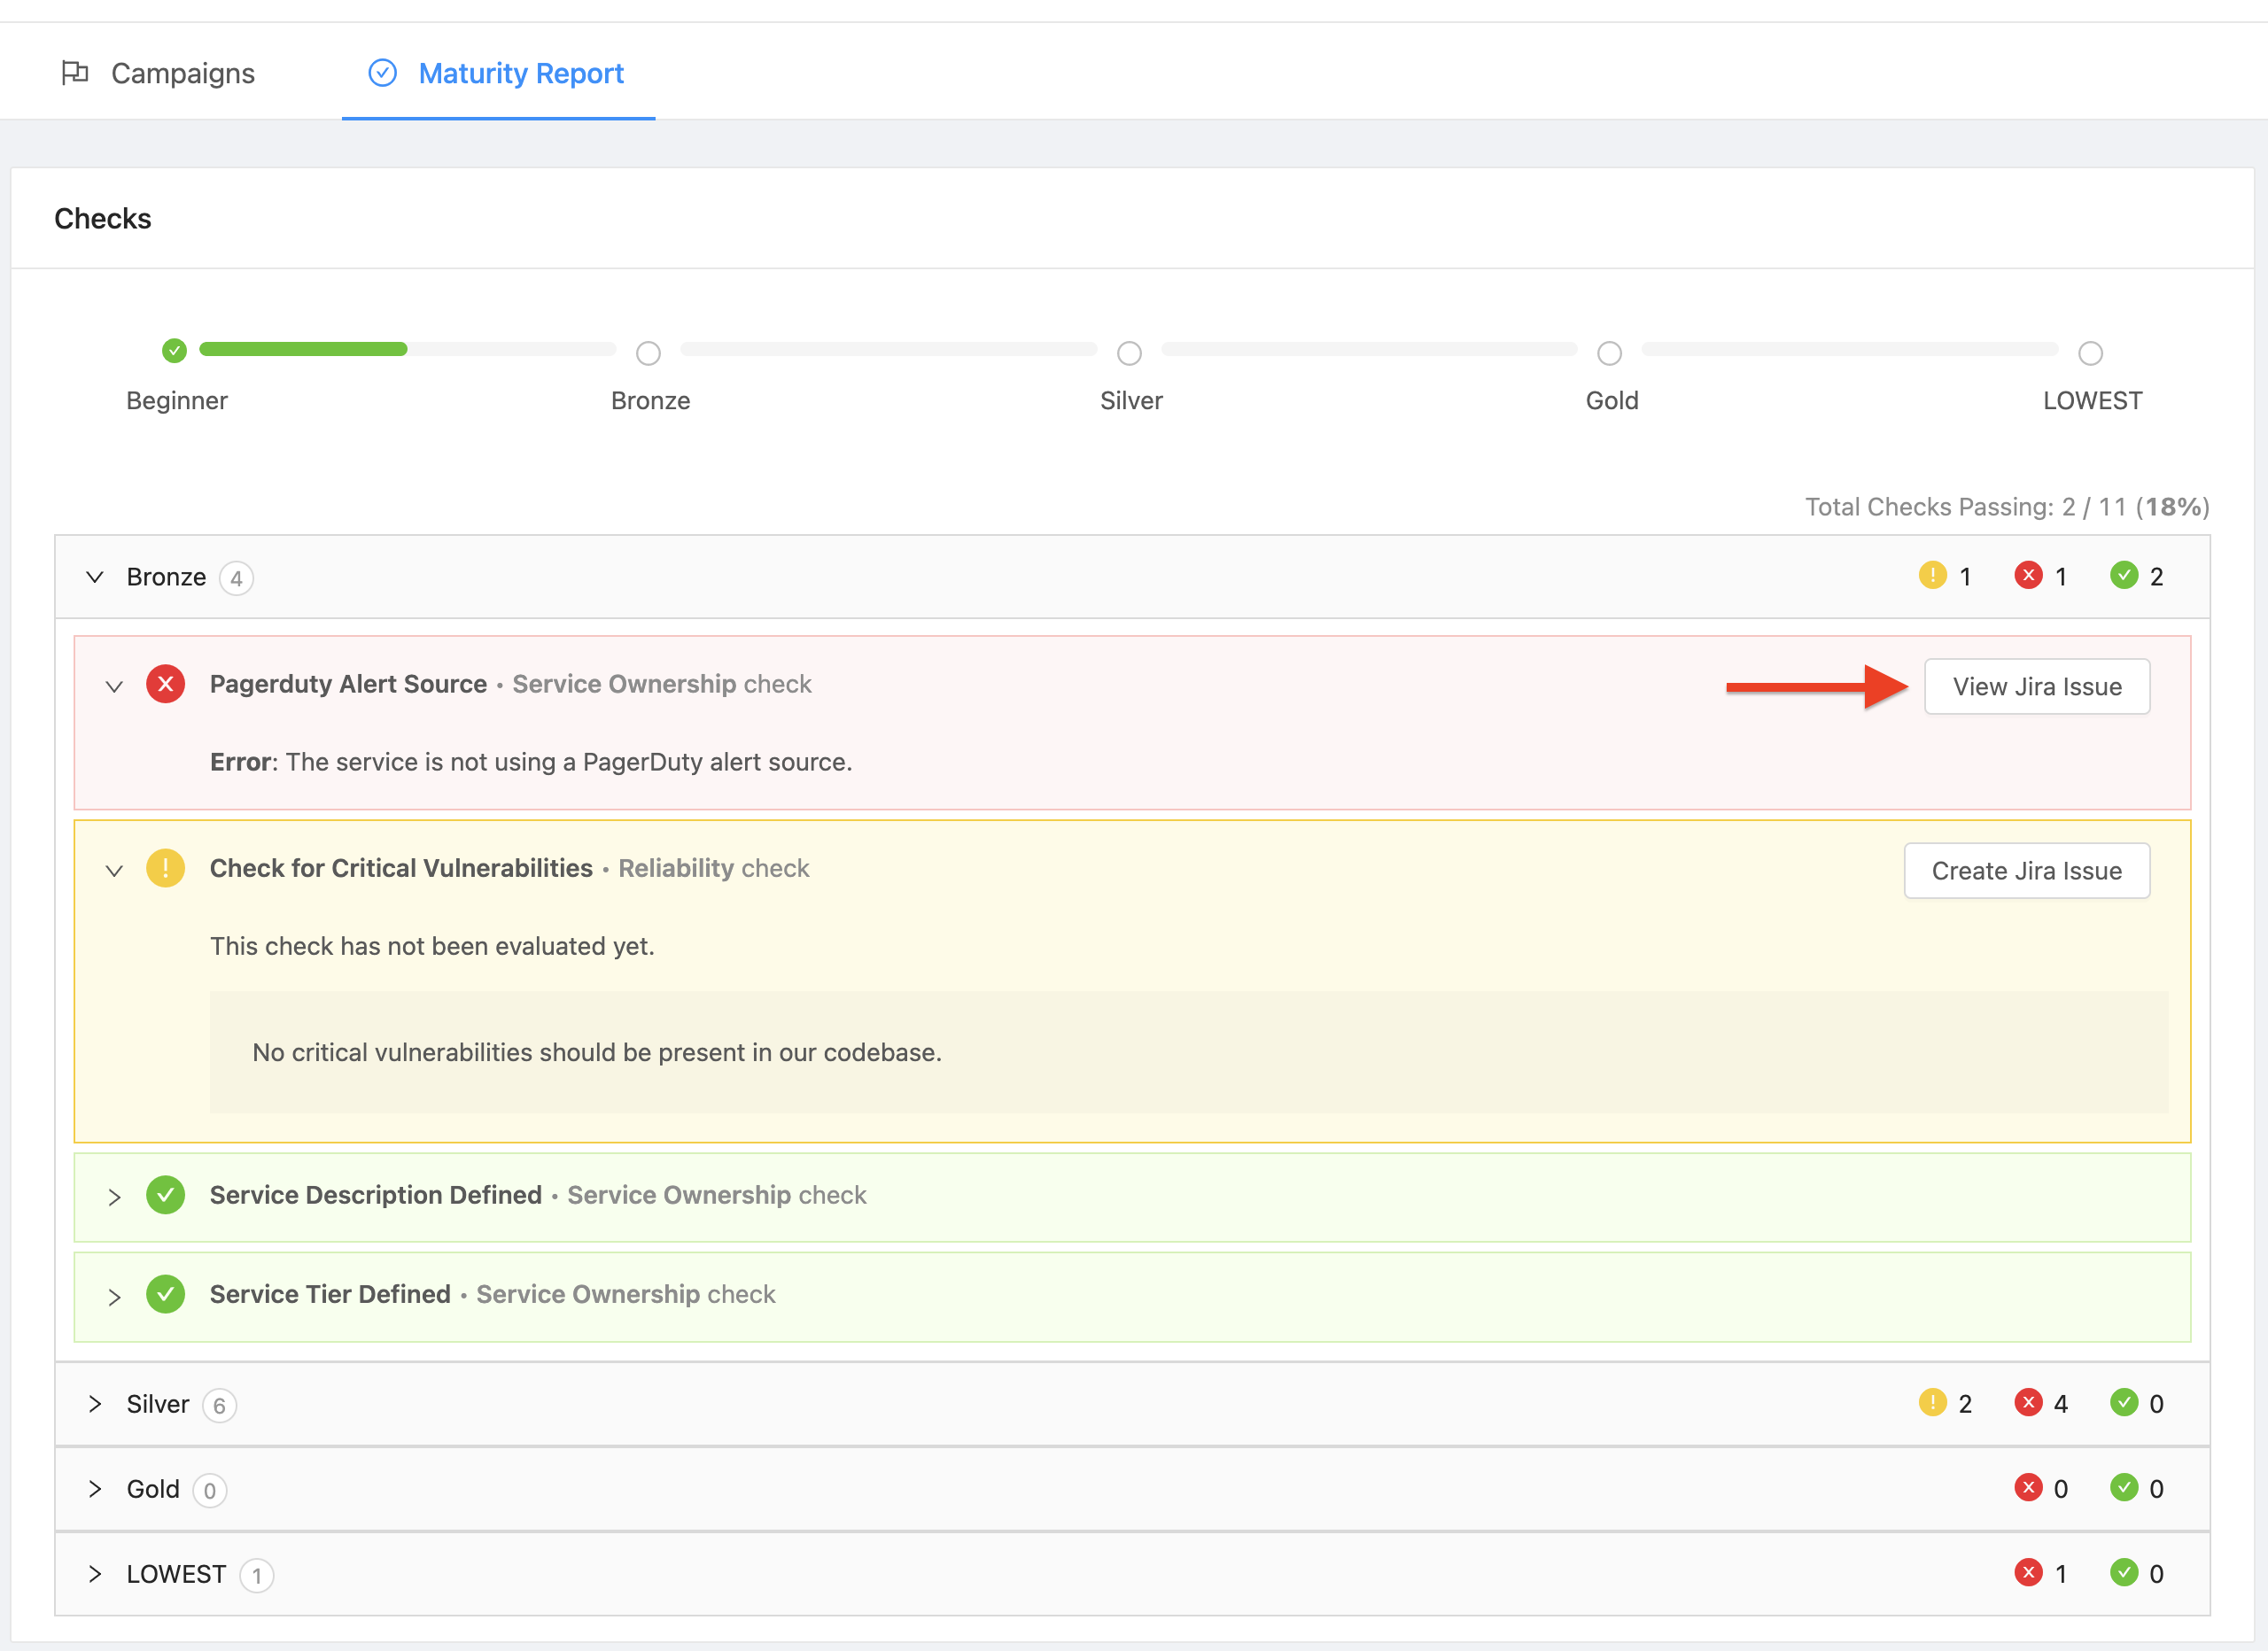
Clicking on View Jira Issue will open a new tab in Jira to view your issue. If the issue is marked as complete or deleted in Jira, we’ll un-attach the issue in OpsLevel.
Note: For the time being, only one issue can be created per Check and Service pair at one time.
Installation
Installing the Jira integration can be completed in seconds.
- In the OpsLevel app, from the left-hand menu, navigate to Integrations and click the New Integration tile.
- Click the Jira tile and then the Take me to Jira button as shown below. Please make sure your Jira user role is at least
Administer Jira - On the next screen, select the Jira site you would like to authorize and click accept. You will need to logged in to Jira first.
Important: Manually Adding Webhooks to Jira
For the integration between Jira and OpsLevel to work properly you’ll need to manually setup webhooks on Jira’s side.
Due to limitations with Jira’s create webhook API endpoints creating webhooks manually is the only way to ensure the integration works correctly.
Note: You will have to do this for every site you’ve authorized with OpsLevel.
1. Log in as a user with the Administer Jira global permission.
2. Choose ⚙️ > System. Under Advanced, select WebHooks.
3. Select Create a WebHook.
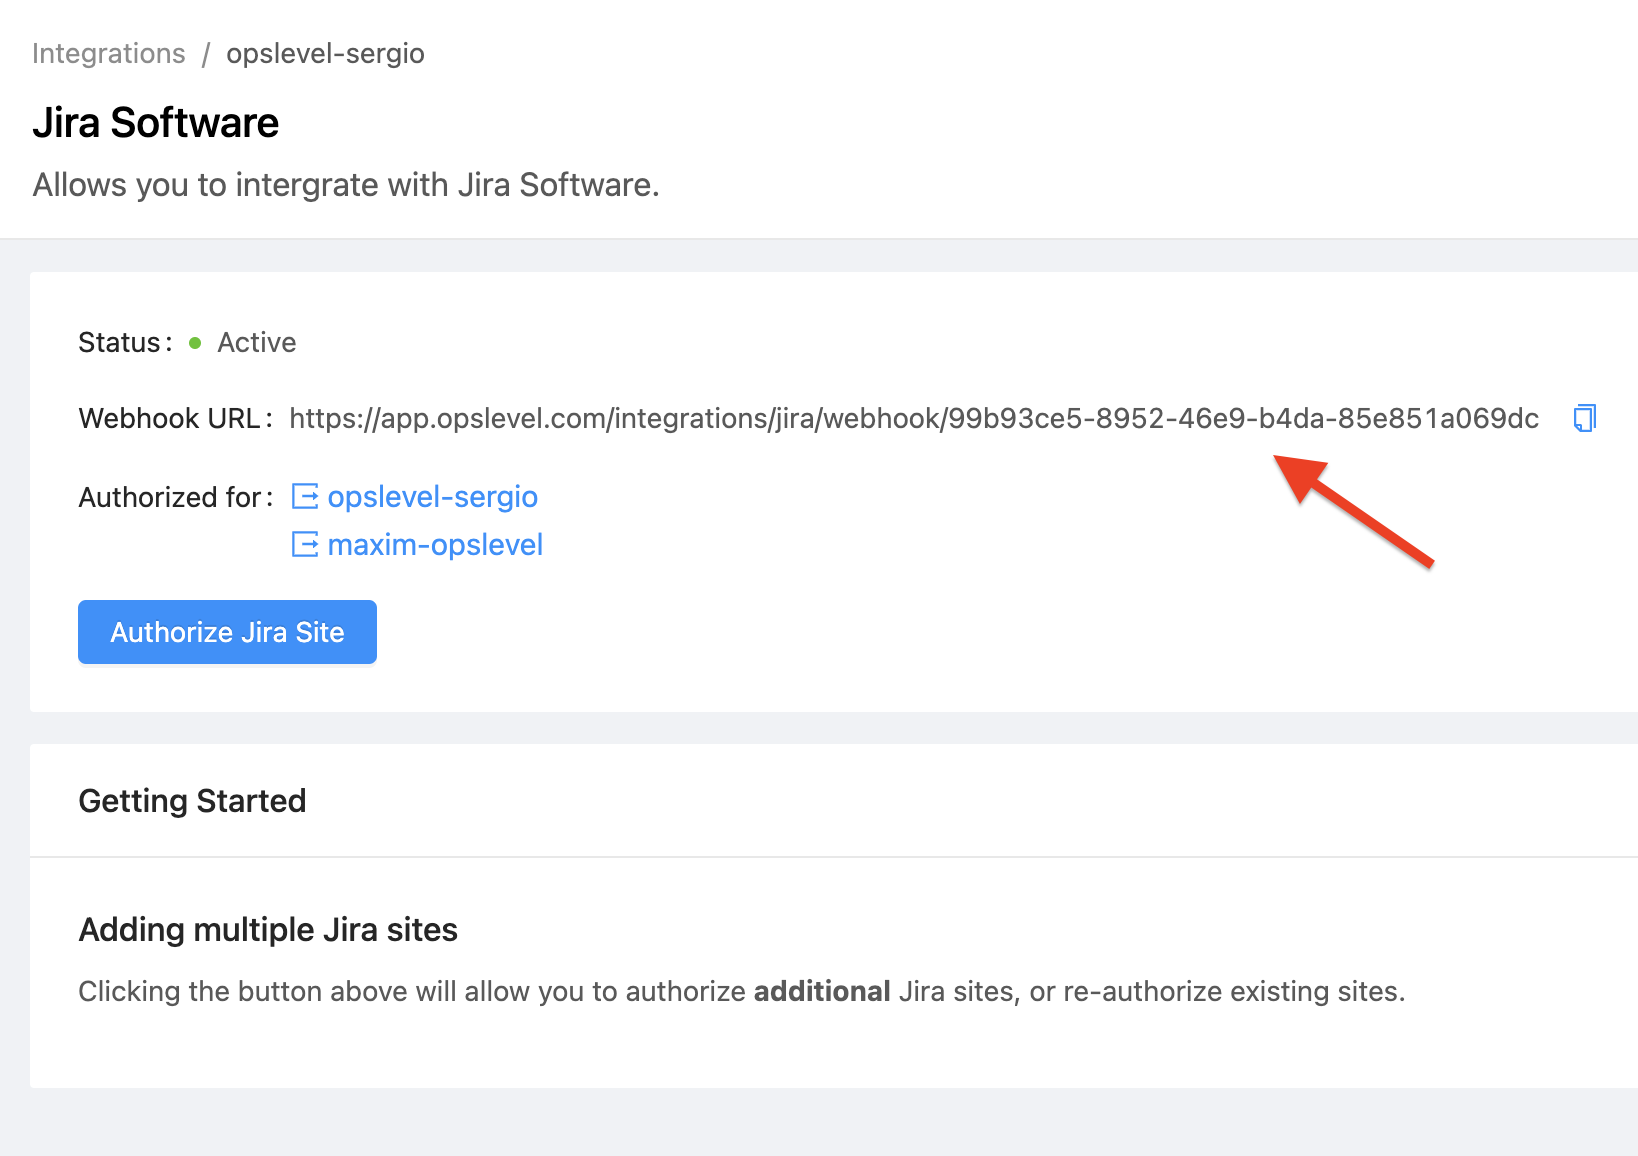
4. Copy the OpsLevel webhook URL and paste it into the URL box:
5. Back in Jira, select the checkboxes for Issue Created, Updated, and Deleted events.
6. Your webhook creation form should look something like this:
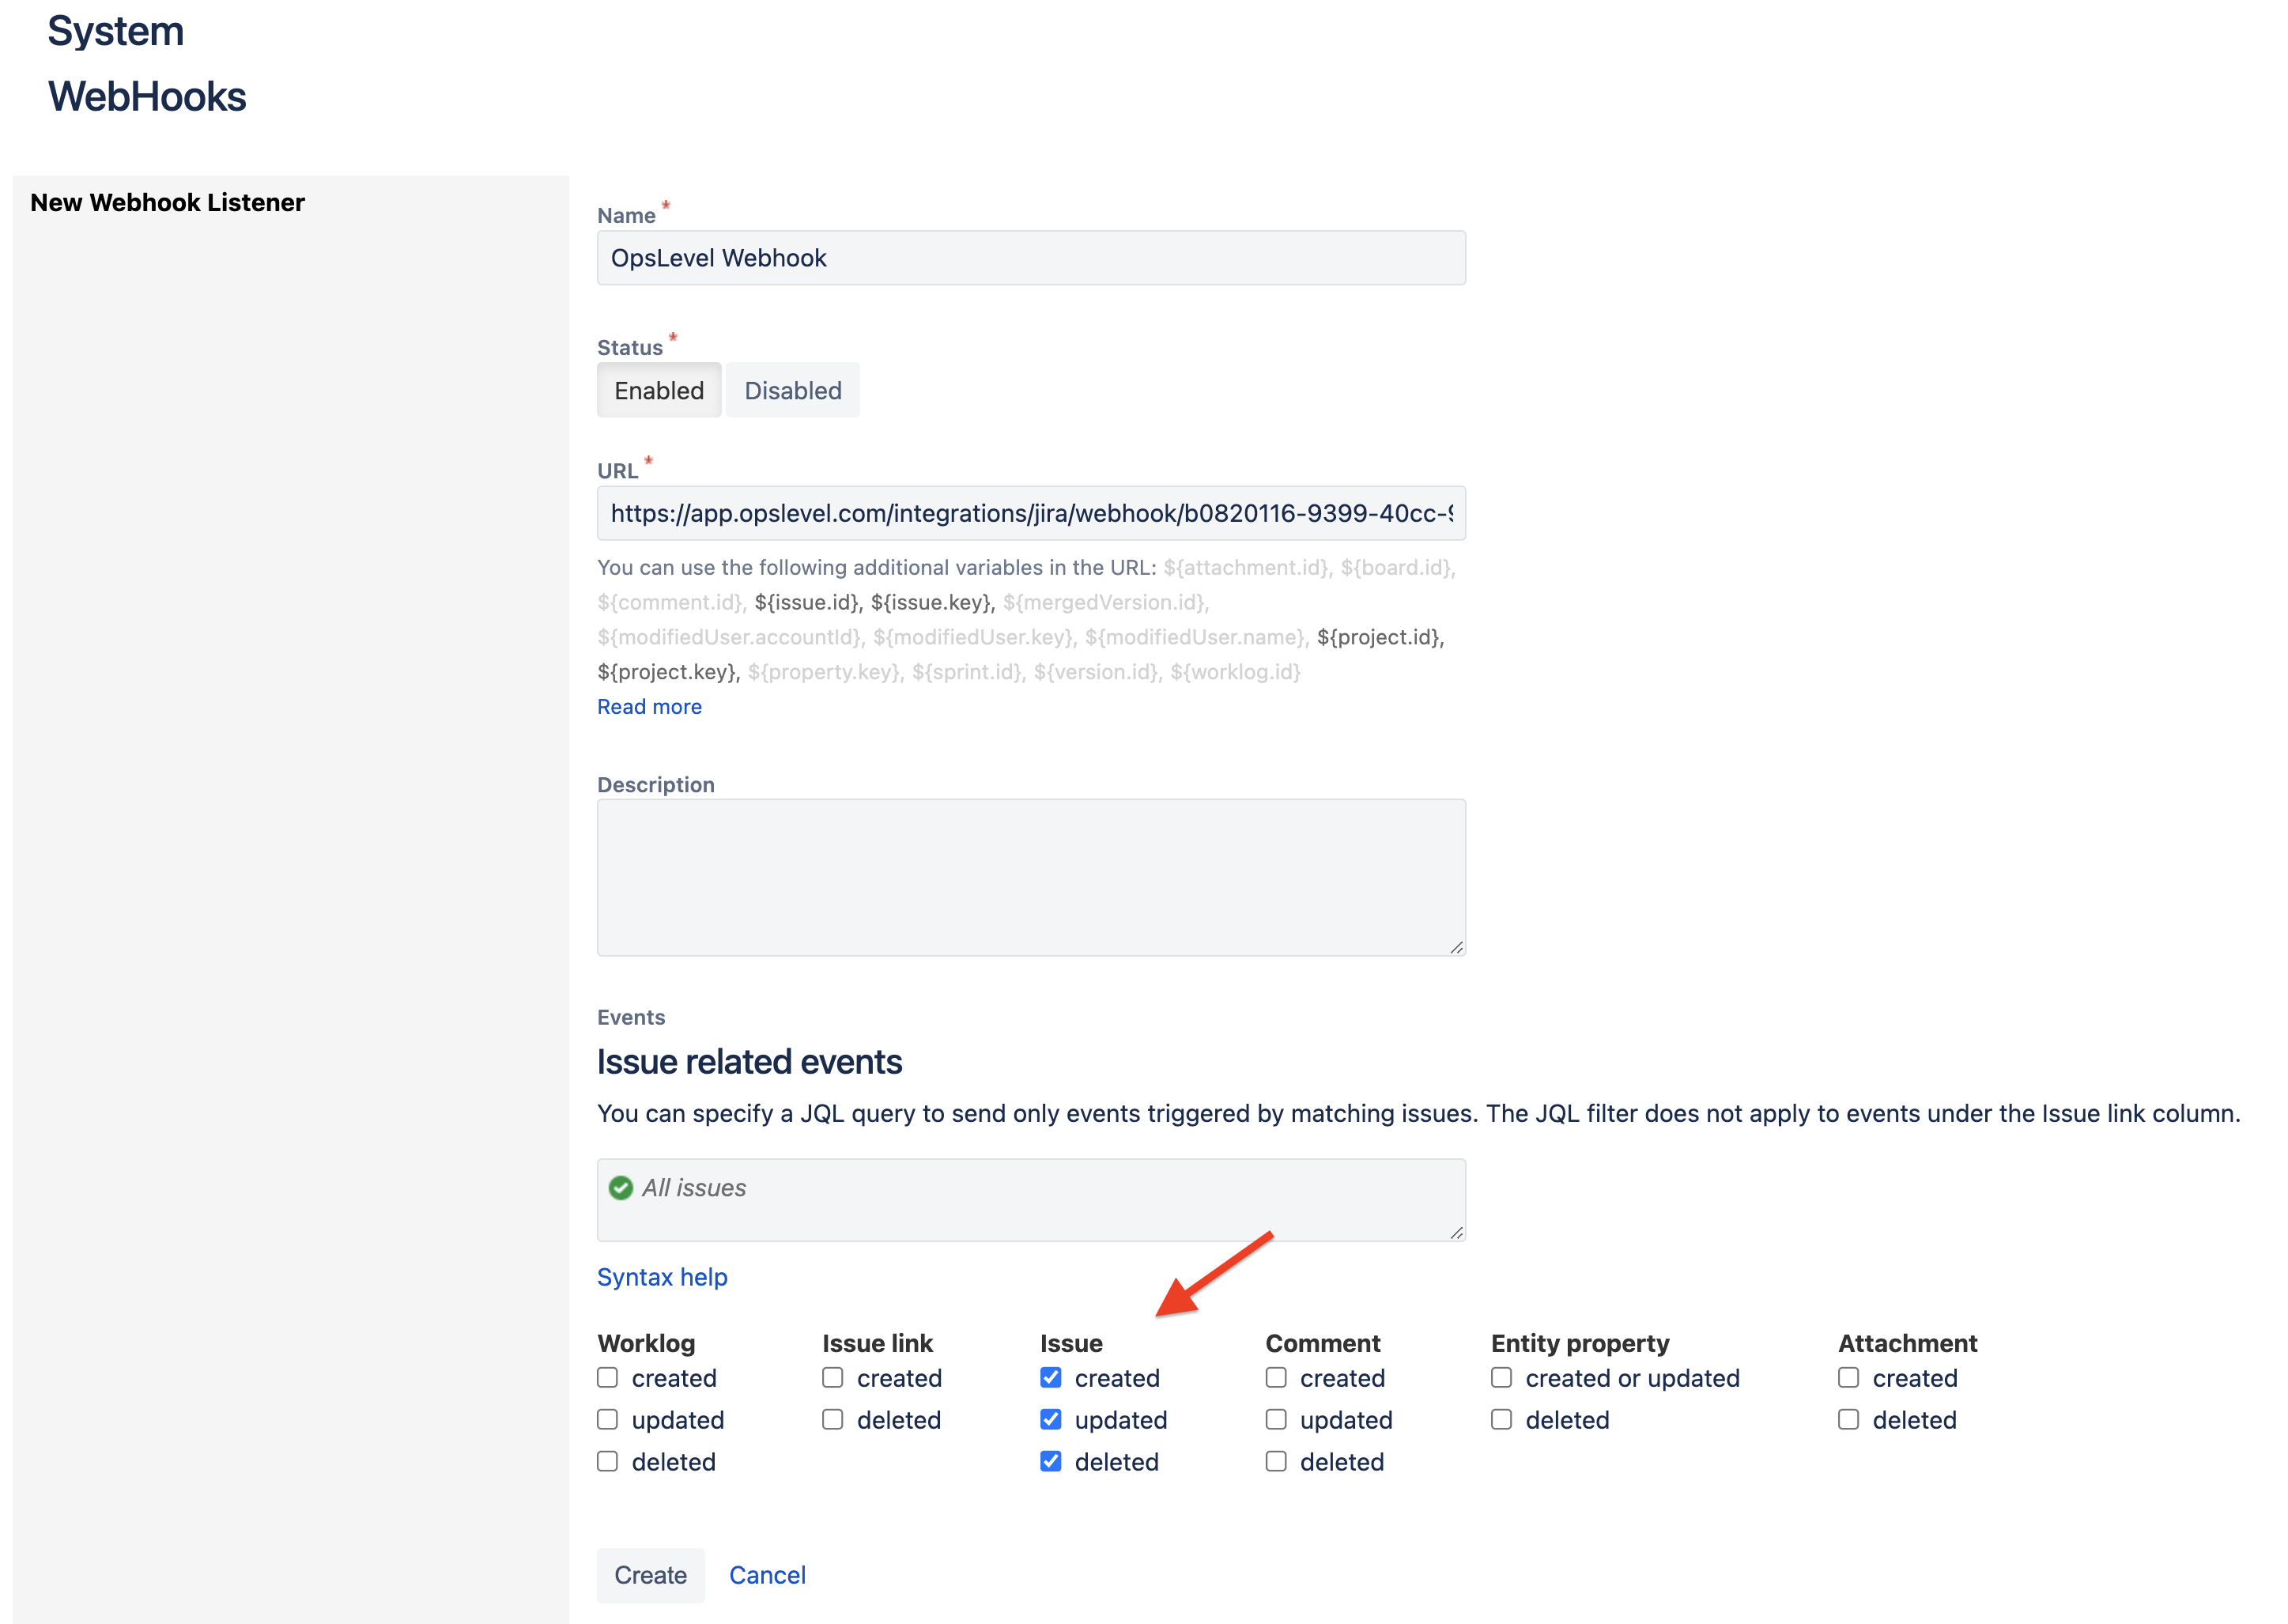
7. Finish setting up your webhook by selecting Create.
8. OpsLevel is now synced with your Jira site!
Authorizing Multiple Jira Sites
OpsLevel’s Jira integration supports multiple Jira sites.
- In order to integrate with multiple Jira sites, navigate to Integrations and click on your existing Jira integration tile.
- Once you’re on your integration’s page, click the Authorize Jira Site button.
- You’ll once again be redirected to Jira’s authorization screen. While there, select the additional site you would like to integrate with. You may integrate with as many Jira sites as you need.
Updated 8 months ago