Jira Cloud + Self Hosted OpsLevel
This integration requires that your Self-Hosted OpsLevel Instance is available to receive requests over the internet from Jira CloudThis integration relies heavily on webhooks, so for the full experience your Self-Hosted OpsLevel instance must be accessible to Jira Cloud.
If you use Jira Cloud and would like to use the Jira Software integration for OpsLevel with your self hosted OpsLevel application, you will need to create an Atlassian 3-Legged OAuth Application.
Create an Atlassian Application
To get started, you'll need to create an Atlassian Developer account. When logged in, navigate to the Developer console, click the Create button group to open the menu and click the OAuth 2.0 integration.
To configure the application, follow the following steps:
- Give the Application a name (for example, OpsLevel) and accept the Atlassian terms before creating the application.
- Navigate to the Permissions tab from the left navigation menu.
- Click the Add button in the Jira API row and press Configure to open the scope selection page.
- Navigate to the Granular scopes tab and press the Edit Scopes button
- Enable the 29 scopes outlined below in the Scopes table before saving.
- Navigate to the Authorization tab from the left navigation menu.
- Enter
<Self-Hosted OpsLevel Domain>/integrations/jira/finish_setupas the Callback URL, where<Self-Hosted OpsLevel Domain>is the publicly accessible domain of your Self-Hosted instance. - Press the Save Changes button
- Navigate to the Settings tab from the left navigation menu
- Copy the Client ID and Secret from the Authentication Details section for use in the Replicated Admin Console.
Scopes
| Scope Name | Code |
|---|---|
| Create and update webhooks. | write:webhook:jira |
| Delete webhooks. | delete:webhook:jira |
| Read issue type hierarchies. | read:issue-type-hierarchy:jira |
| View application roles. | read:application-role:jira |
| View fields. | read:field:jira |
| View issue attachments. | read:attachment:jira |
| View issue comments. | read:comment:jira |
| View issue field valueses. | read:issue-field-values:jira |
| View issue links. | read:issue-link:jira |
| View issue security levels. | read:issue-security-level:jira |
| View issue types. | read:issue-type:jira |
| View issue votes. | read:issue.votes:jira |
| View issue watchers. | read:issue.watcher:jira |
| View issue worklogs. | read:issue-worklog:jira |
| View issues. | read:issue:jira |
| View JQL. | read:jql:jira |
| View labels. | read:label:jira |
| View priorities. | read:priority:jira |
| View project categories. | read:project-category:jira |
| View project components. | read:project.component:jira |
| View project properties. | read:project.property:jira |
| View project versions. | read:project-version:jira |
| View projects. | read:project:jira |
| View resolutions. | read:resolution:jira |
| View statuses. | read:status:jira |
| View system and custom avatars. | read:avatar:jira |
| View user groups. | read:group:jira |
| View users. | read:user:jira |
| View webhooks. | read:webhook:jira |
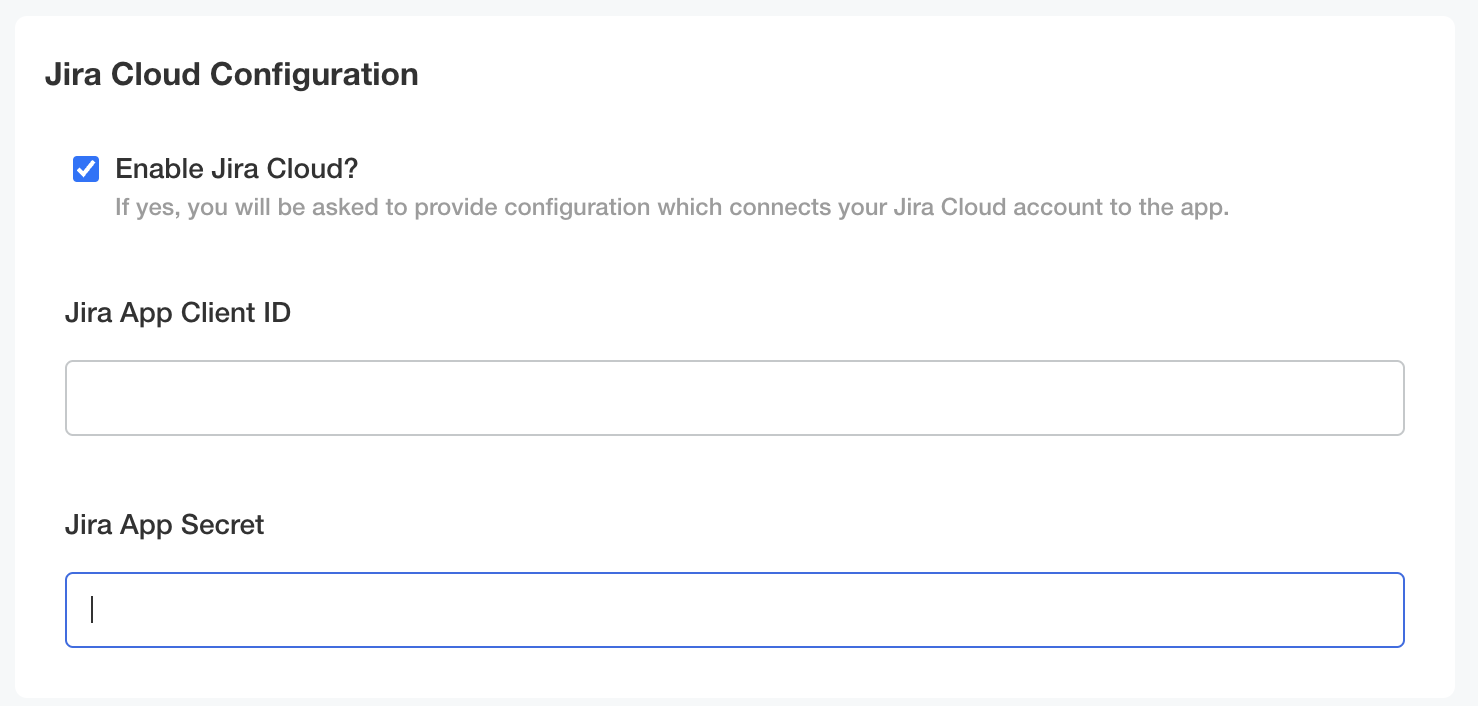
Replicated Admin Console
In your Self-Hosted OpsLevel Config, navigate to the Jira Cloud Configuration Section.
Using the values you copied from Step 10 above, enter the Client ID and Secret values before saving and deploying your new configuration.
Setting up the Jira Software Integration
Now that the application is configured, you can follow the steps outlined in the Jira Software integration guide to complete the integration setup.
Updated 7 months ago