OneLogin User Provisioning with SCIM
Provision users automatically from OneLogin to quickly build your catalog and keep your users fresh.
If your organization uses OneLogin to manage your employees’ access to tools and services, you can take advantage of OneLogin's “Provisioning” feature to automatically grant access to OpsLevel to your users.
The integration between OneLogin and OpsLevel that enables this provisioning to occur is built around an industry-standard protocol known as SCIM (System for Cross-domain Identity Management). To learn more about how OneLogin works with SCIM, please see this article.
The remainder of this guide is focused on enabling you to configure both OpsLevel and OneLogin to get provisioning up and running for your organization.
If you are interested in how to set up Single Sign-On in OpsLevel via OneLogin, please check out our guide here.
Features
The following provisioning features are supported by OpsLevel today:
- Push Users: Users in OneLogin that are assigned to the OpsLevel application within OneLogin are automatically added as users in OpsLevel
- Update User Attributes: When user attributes are updated in OneLogin, they will be updated in OpsLevel.
- Deactivate Users: When users are deactivated in OneLogin, they will be set to ‘Deactivated’ within OpsLevel – which prevents the user from logging into OpsLevel.
Requirements
SCIM-based user provisioning is available to all customers of OpsLevel at this time.
Step-by-step configuration instructions
The OpsLevel - OneLogin Provisioning integration uses the same Application in OneLogin as our Single Sign-On integration. We recommend you configure Single Sign-On first by following the steps here.
Create a SCIM Integration in OpsLevel
In order to complete Step 5, you'll need to be logged in as a user with the Admin role. For more information on roles in OpsLevel, check out the guide.
1. In the OpsLevel app, Click Integrations in the left sidebar.
2. Click the +New Integration tile.
3. On the New Integrations page, click the SCIM tile.
4. Click Create to create a new SCIM Integration.
5. On the SCIM Integration page, press the + Create API Token button and follow the prompts to create your API Token. When created, copy the token for use in Step 6 of Configuring the OpsLevel OneLogin Application below.
NOTE: Ensure that you keep the token in a safe place as you will need it when configuring the integration within OneLogin and you will not be able to retrieve the value again later. If you do need to retrieve the value you will have to replace the token by clicking Delete API Token and repeat the API Token creation flow.
6. While on this page, copy the SCIM API URL for use in Step 5 of configuring the OpsLevel application in OneLogin.
Configure User Provisioning in the OpsLevel OneLogin Application
Since the configuration settings for SSO and SCIM use a shared application within OneLogin, the below steps assume you've installed the OpsLevel application in OneLogin already. If you haven't, follow our steps to set up a OneLogin SAML application.
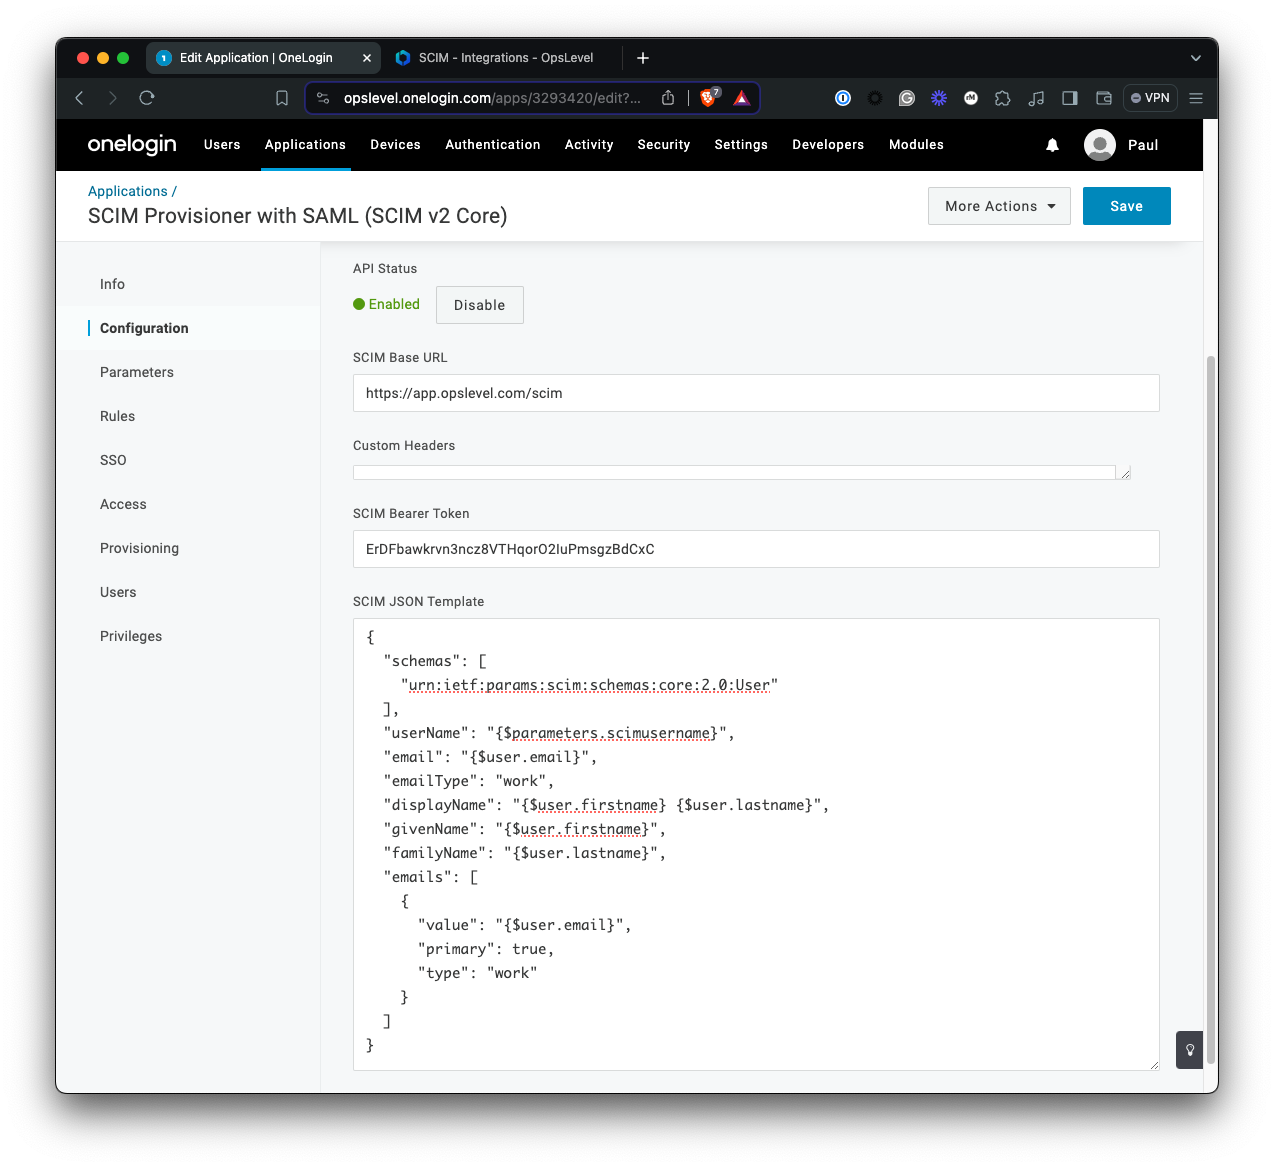
1. Click on the Configuration tab, then scroll down to the API Connection settings.
2. Input the following values into each of the inputs:
- For the SCIM Base URL field use the SCIM API URL (from Step 6 above) .
- For the SCIM Bearer Token use the API Token (from Step 5 above)
3. For SCIM JSON Template, we'll have to use a custom template. Copy and paste the following into the text box.
{
  "schemas": [
    "urn:ietf:params:scim:schemas:core:2.0:User"
  ],
  "userName": "{$parameters.scimusername}",
  "email": "{$user.email}",
  "emailType": "work",
  "displayName": "{$user.firstname} {$user.lastname}",
  "givenName": "{$user.firstname}",
  "familyName": "{$user.lastname}",
  "emails": [
    {
      "value": "{$user.email}",
      "primary": true,
      "type": "work"
    }
  ]
}
Upon completion, your API Connection settings should be similar to the following:
4. Navigate to the Parameters tab.
5. Our SCIM JSON template makes use of the scimusername when generating requests but our API requires it's value to be set to the provisioned user's email. Update the value of scimusername to use Email.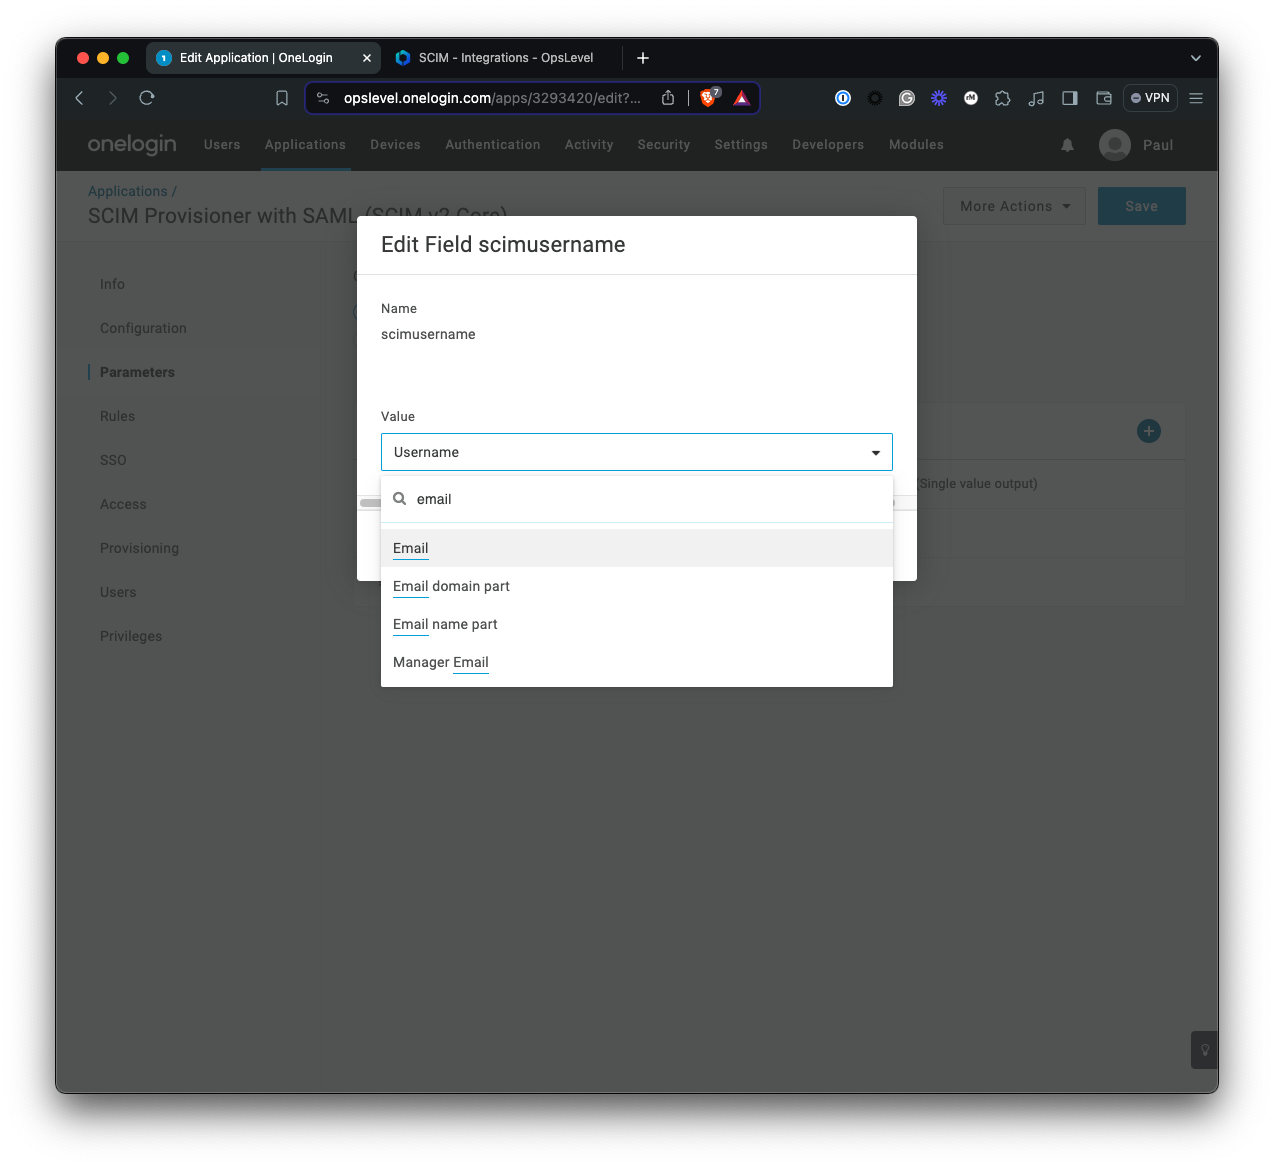
6. Navigate to the Provisioning tab and check the Enable Provisioning checkbox.
7. Save your configuration settings.
8. Head over to the Configuration tab and Enable the API.
Now that provisioning is configured, you can assign your OneLogin users to the OpsLevel application as needed. New OpsLevel users provisioned this way will be automatically invited to your OpsLevel organization and receive a welcome email with a link to the OpsLevel application.
Troubleshooting
If you have questions or difficulties with the SCIM integration, hit us up at [email protected].
Updated 7 months ago