SSO with Microsoft Entra ID (Azure Active Directory)
Streamline user's access to OpsLevel using Single Sign-On with Microsoft Entra ID (previously Azure Active Directory).
The OpsLevel Single Sign-On authentication method can be used with your organization’s existing Microsoft Entra ID (Entra ID) identity provider by configuring a SAML integration. Below are the detailed steps on how to get started using Entra ID and OpsLevel's SAML.
Requirements
To configure SSO, you need:
- A Microsoft Entra ID tenant.
- A user account in Microsoft Entra ID with permission to configure provisioning (for example, Application Administrator, Cloud Application administrator, Application Owner, or Global Administrator).
- An OpsLevel account -- SCIM-based user provisioning is available to all customers of OpsLevel at this time..
- A user account in OpsLevel with an Admin role.
Setting up the Entra ID Application
Note: You will need access to your SAML Endpoint URL located in the Authentication Method section of your OpsLevel Account Settings. Only admin users will have access to this section

Create a new Enterprise Application in the Microsoft Entra Admin Center
To set up the Entra ID SAML application for OpsLevel, first:
1. Sign in to the Microsoft Entra Admin Center portal.
2. In the left sidebar Enterprise Applications and then select All Applications.
3. To add new application, select New application.
4. Select the + Create Own Application Button.
5. Enter any name, OpsLevel will do.
6. Follow the Getting Started steps as directed:
Assign users and groups
1. Add any users and groups that you'd like to grant access to OpsLevel.
2. This can just be a single admin user during setup/onboarding, more can be added at anytime.
Set up Single Sign On
1. In the Microsoft Entra Admin Center, on the OpsLevel application integration page, find the Manage section and select single sign-on.
2. On the Select a single sign-on method page, select SAML.
3. On the Set up single sign-on with SAML page, click the edit/pen icon for Basic SAML Configuration to edit the settings.
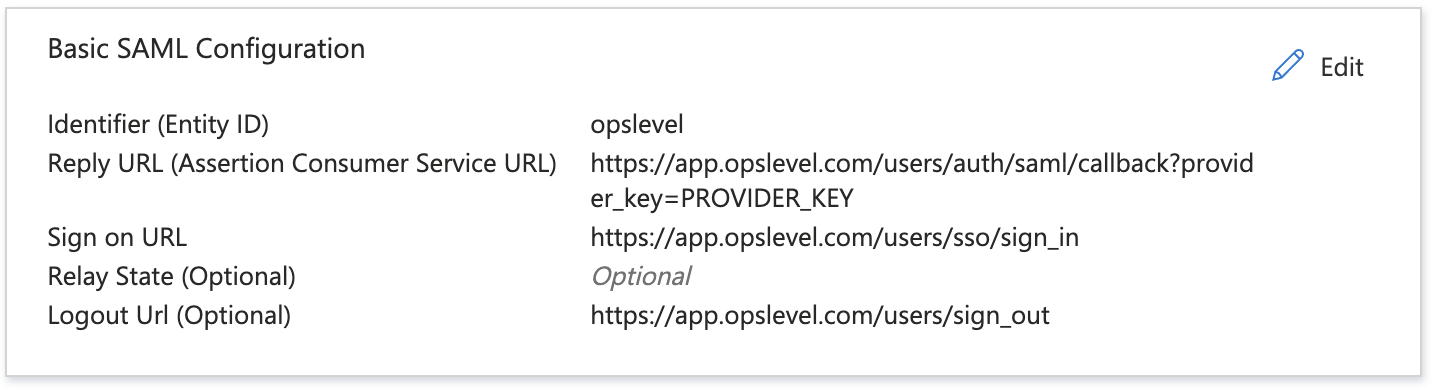
4. On the Basic SAML Configuration section, perform the following steps:
- In the Identifier text box put
opslevel. - In the Reply URL text box, paste in the SAML Endpoint URL from your OpsLevel Account Settings page.
- In the Sign on URL, put
https://app.opslevel.com/users/sso/sign_in. - Optionally, you can include the Logout Url:
https://app.opslevel.com/users/sign_out - After, the Basic SAML Configuration should look something like:
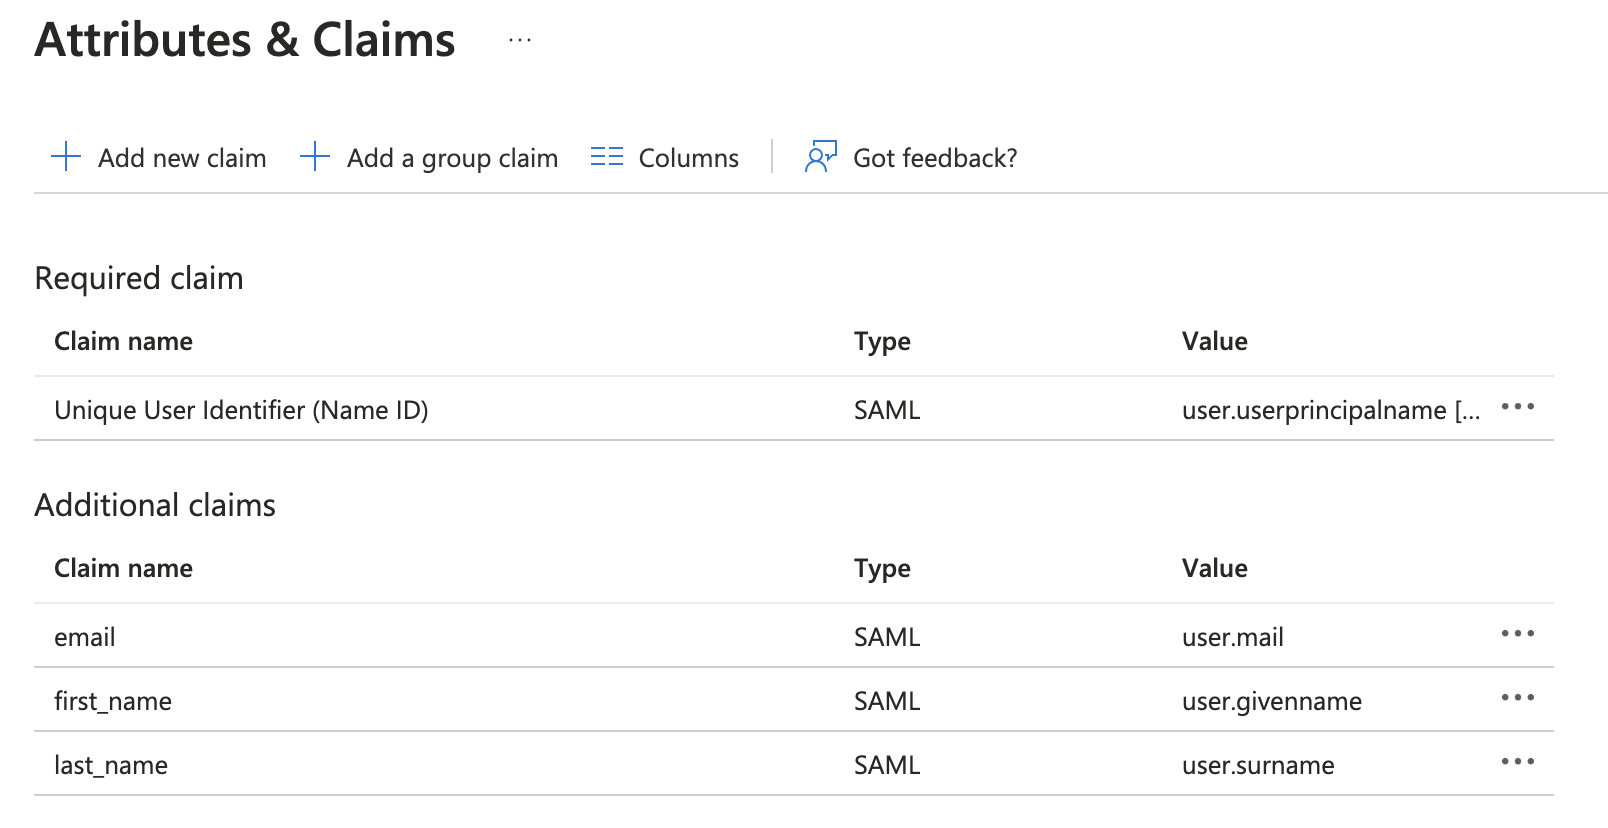
5. Configure the Attributes and Claims
- OpsLevel looks for
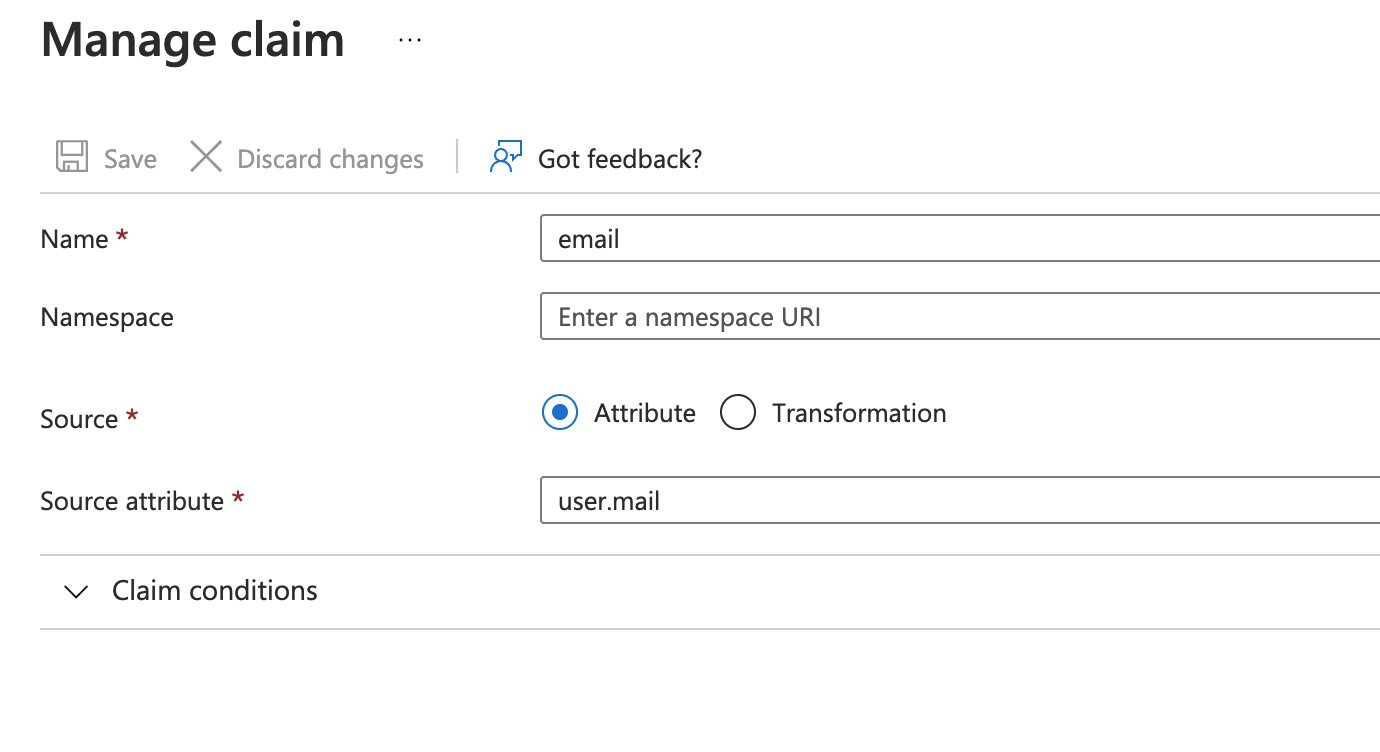
email,first_name, andlast_name. TheUnique User Identifier (Name ID)can be whatever suits your Organization, usuallyuser.principalnameoruser.emailwill do. - Remove or update the existing claims to match the setup below:
Note It's very important that the Namespace field within each claim be left blank, like the email claim below:
6. On the Set up Single Sign-On with SAML page, in the SAML Signing Certificate section, click Download to download the Certificate (Base64) from the given options as per your requirement and save it on your computer.
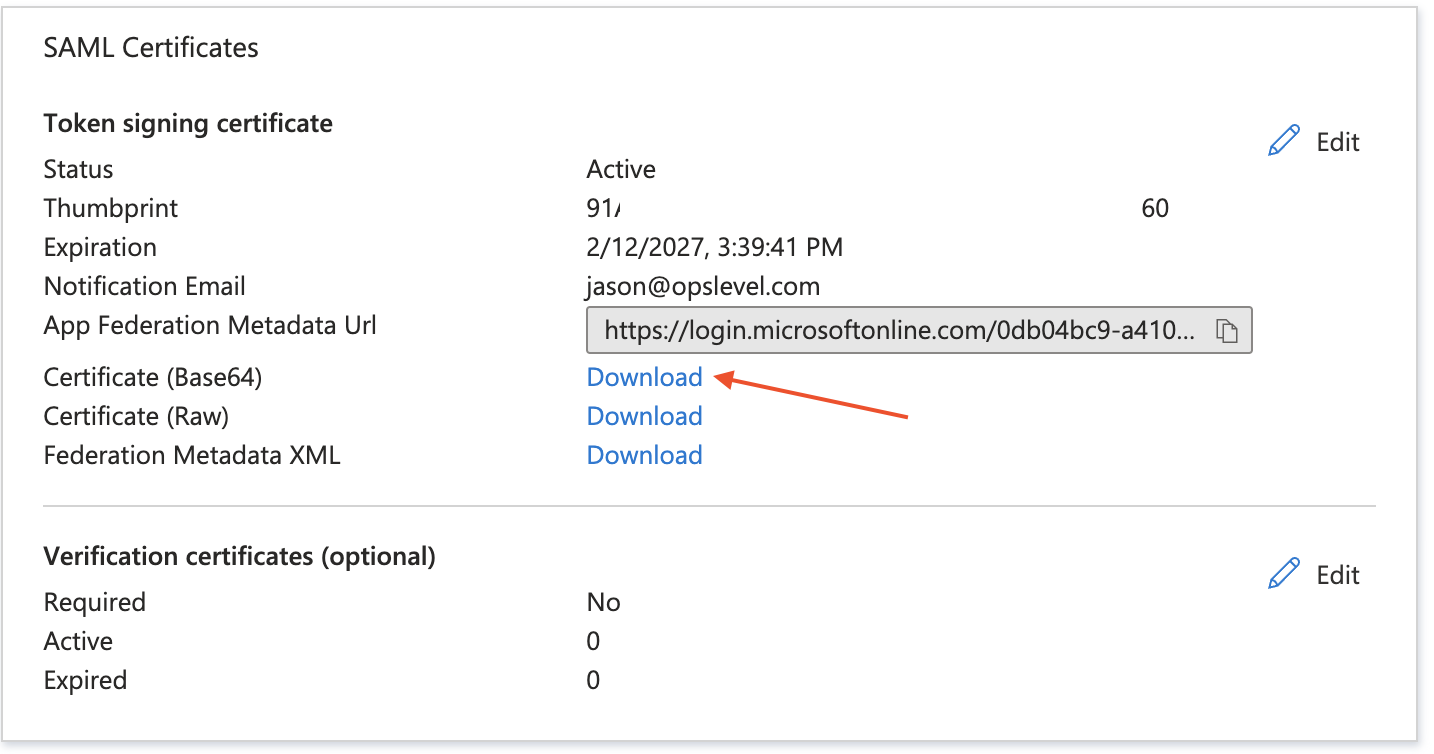
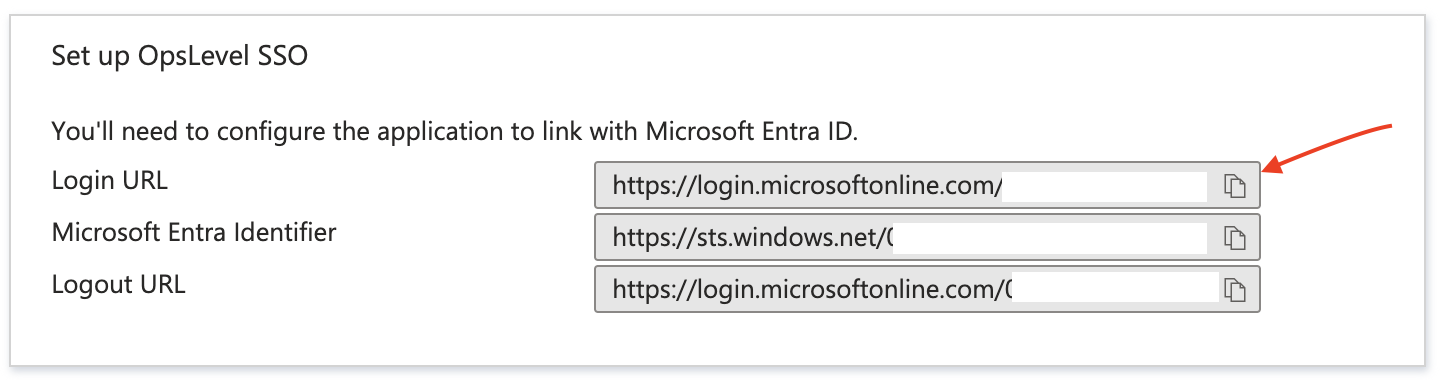
7. You will also need the Login URL to configure SSO in OpsLevel:
Complete configuration in OpsLevel
Any admin user on your OpsLevel account may configure the SAML single sign-on settings by:
1. Navigating to the Authentication Method section of the Account Settings page.
2. Selecting Edit at the bottom of the card.

3. Clicking on the option labeled SAML
4. Specifying the corporate email domain used by your company under: Email Domain.

5. Pasting in the Token Signing Certificate (base64) from the SAML configuration from Microsoft Entra ID.

6. Pasting in the Login URL from the SAML configuration in Microsoft Entra ID.

7. (Optional) De-selecting Allow authentication via email / password once your configuration has been verified as operational.

If you are having trouble setting up your single sign-on in any way, send us an email at [email protected] and we’ll be happy to help debug and diagnose any issues.
Updated 7 months ago